DIY Bottom Entry Bug-Net
Posted by Dutch on Oct 10th 2023
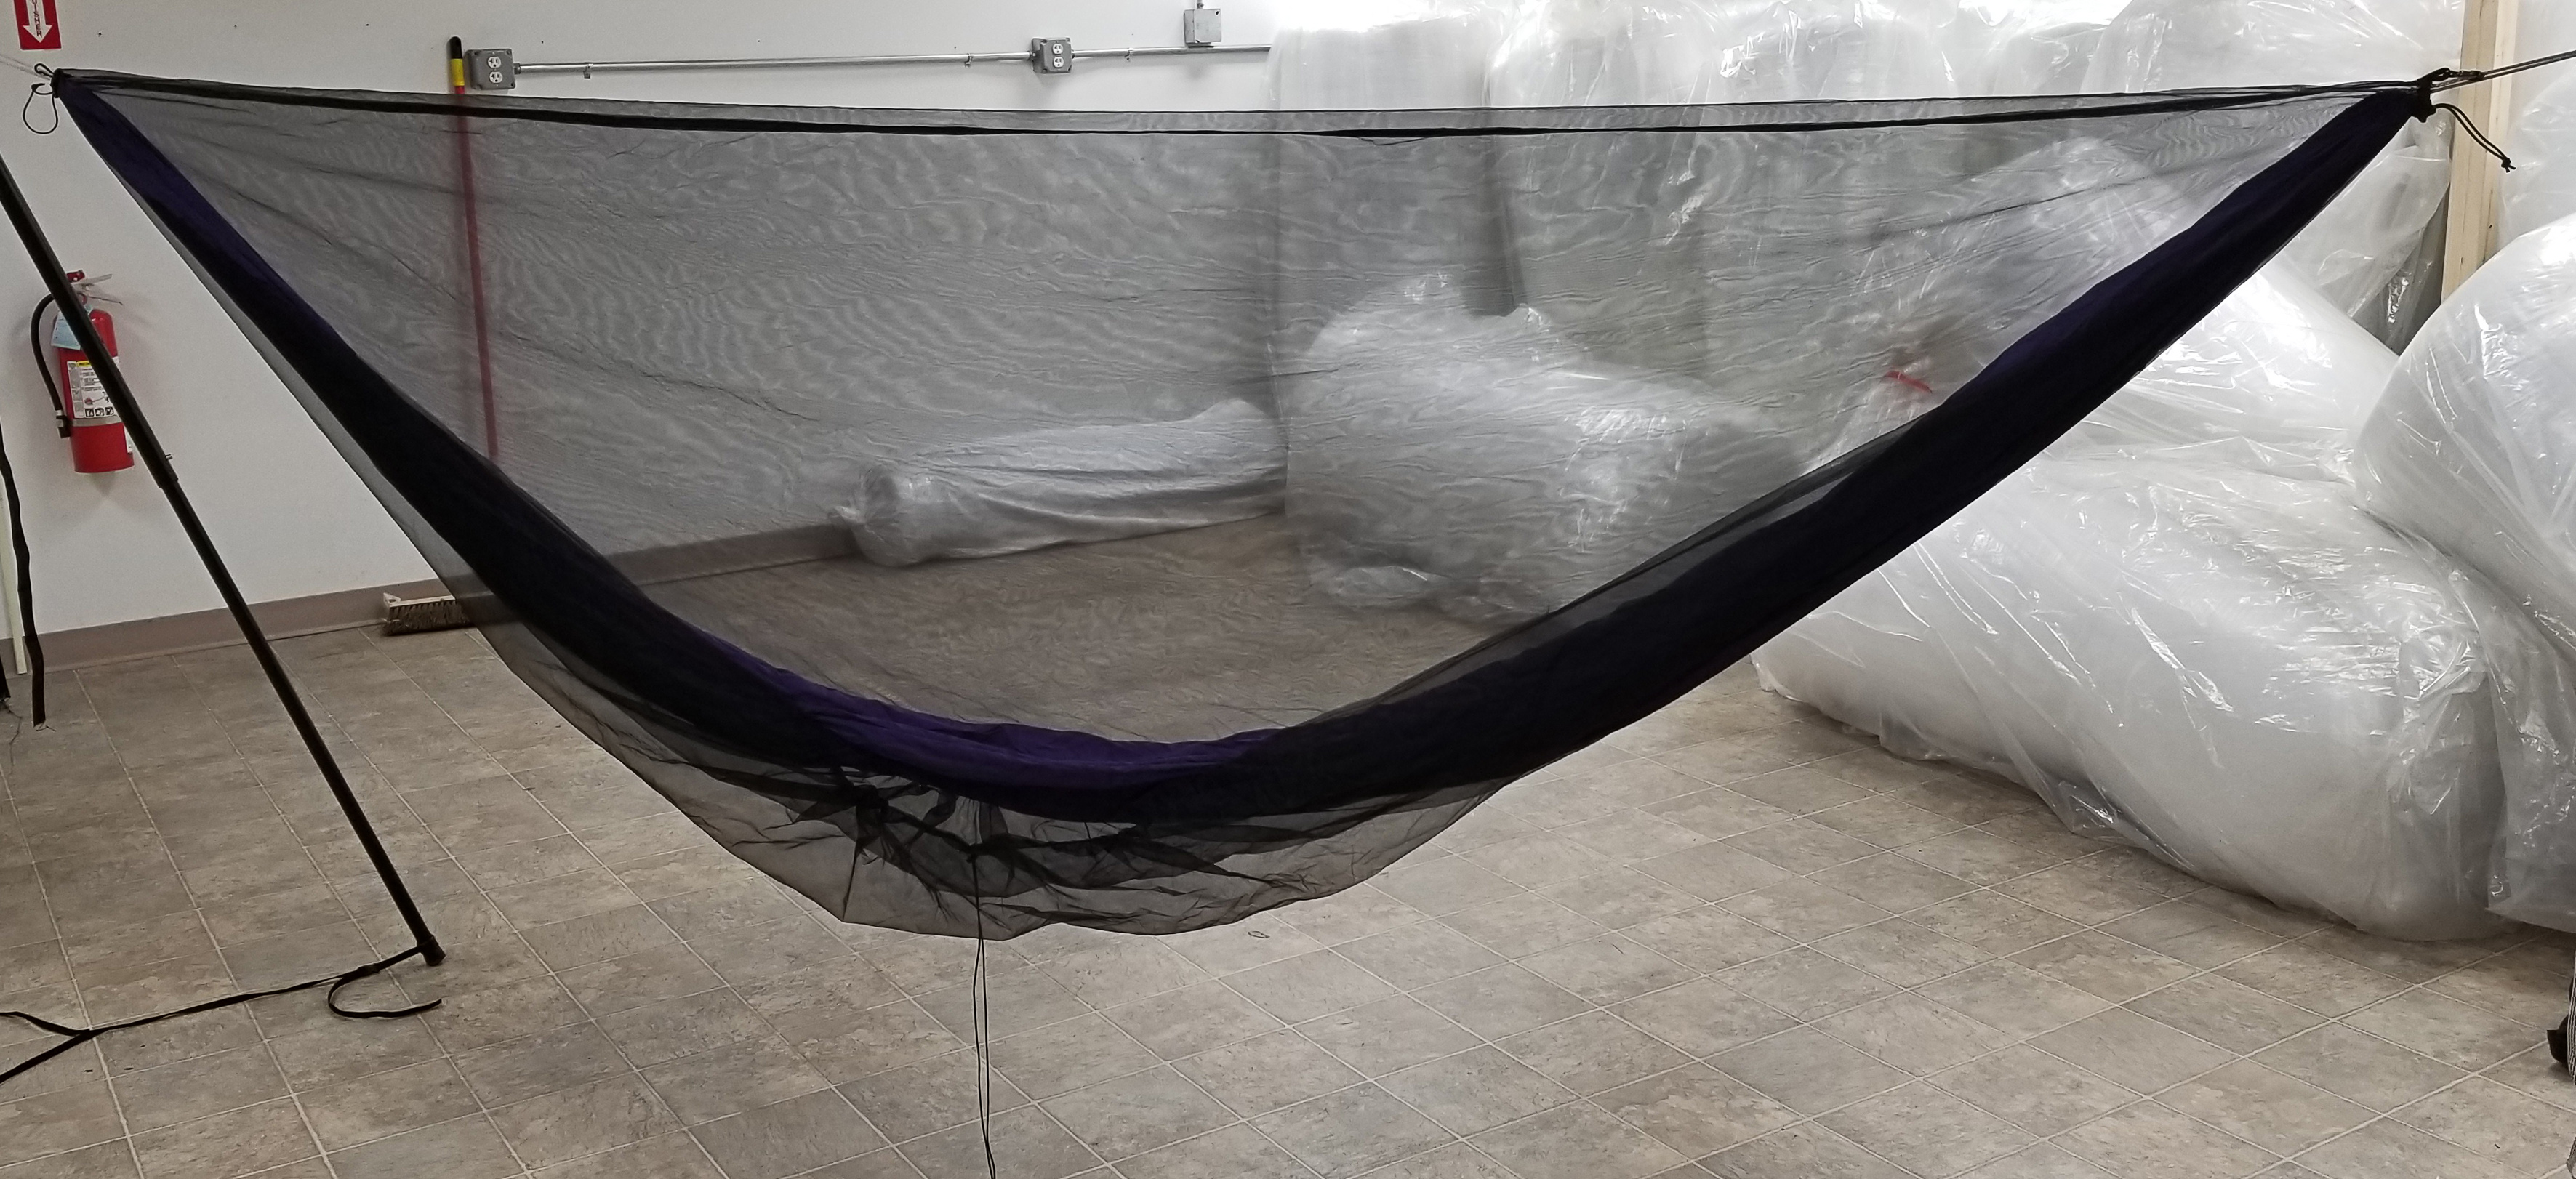
Share:In this tutorial article we will show you how to make your own DIY Bottom Entry Bug-Net.
This bug-net is a fantastic addition to any netless hammock during the buggy seasons. Its a simple design and is a lightweight option for bug protection. These plans are to create an 11' Bottom Entry Bug-Net but the length of the top and bottom can easily be modified to fit any length hammock.
Project Overview
| Skill Level | Estimated Time | Estimated Cost |
| Beginner | 1-2 hours | $$ |
Materials and Tools
| Materials Needed: | Tools Needed: |
| 7 Yards Nano Noseeum | Sewing Machine |
| 1" Grosgrain | Scissors |
| 1/2" Grosgrain | Ruler/Tape Measure |
| 8 Feet 3/32" Shock Cord | Marker or Chalk |
| 2 Mitten Hooks | Lighter |
| 3 Mini Cord Lock |
Preparation Instructions
- You will need to layout and cut a quantity of two of the patterns on the noseeum. I like to fold the noseeum over and cut two at once. This pattern will make an 11' bug net.
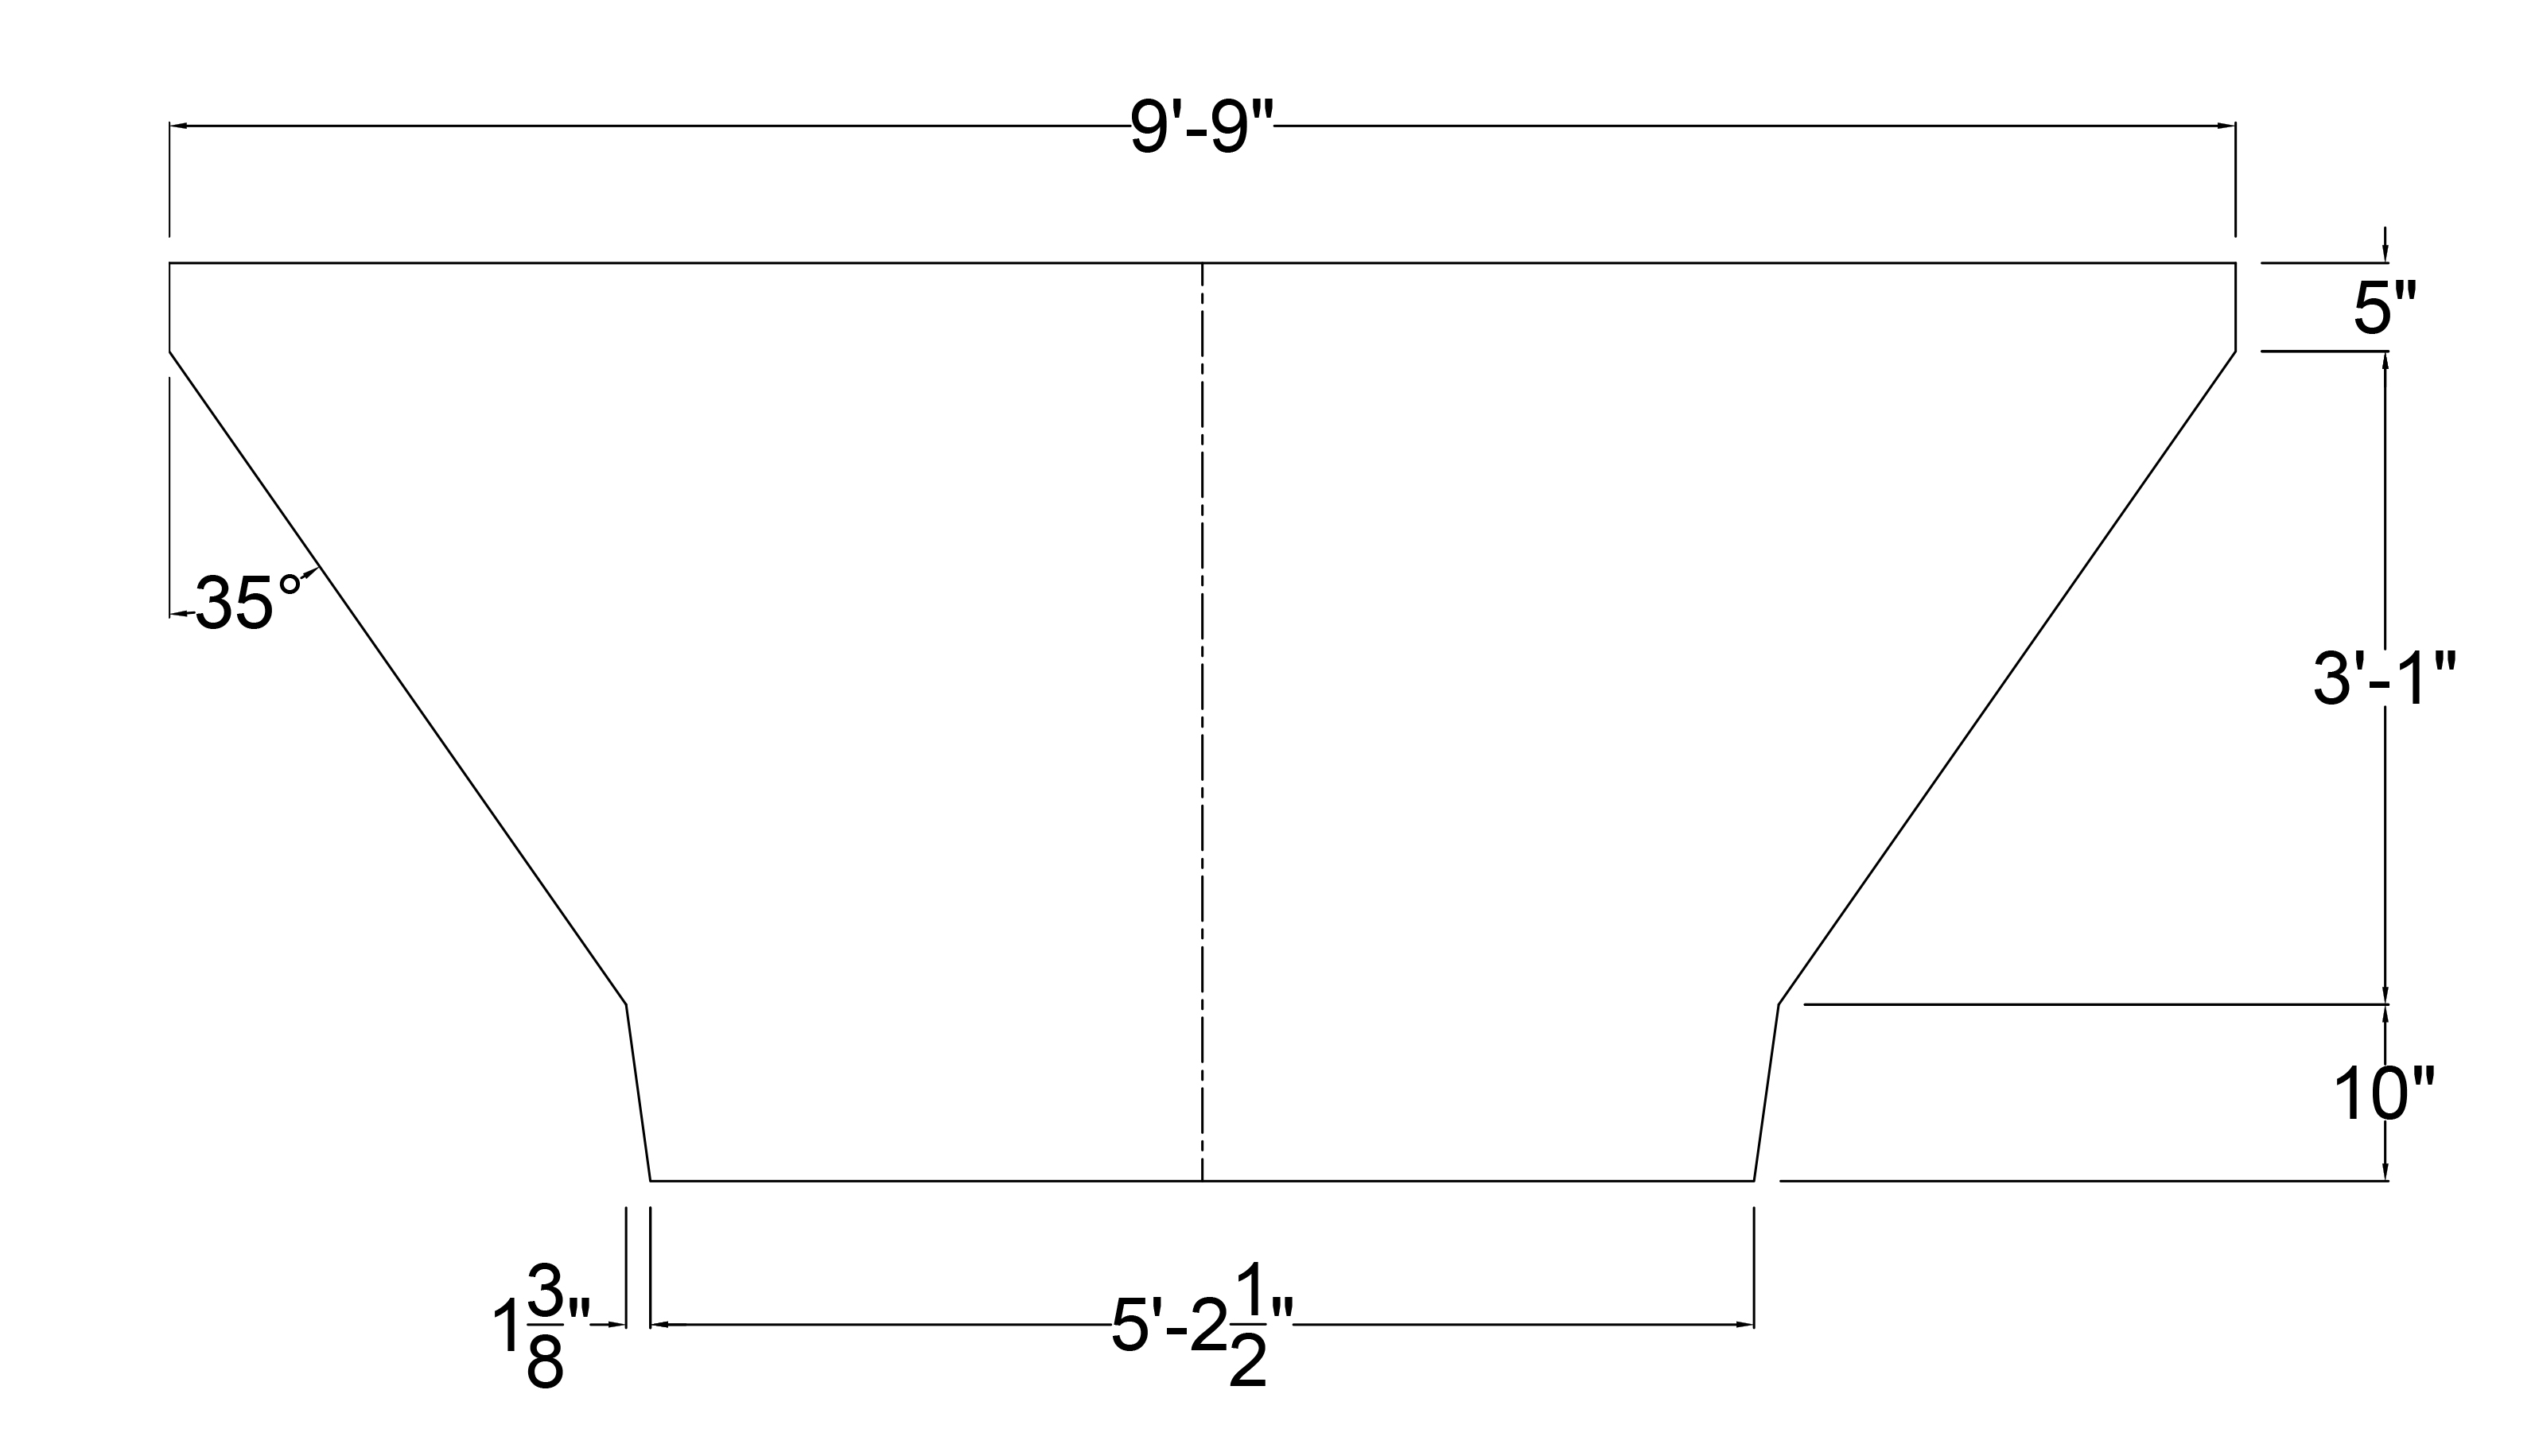
- Notch the center of the bottom of the noseeum. The center is 31 1/4” from the edge on the side that is 5’ 2 ½” Long.
- Cut the 1” Grosgrain into two 10” Lengths. Fuse the ends with a flame.
- Cut the ½” Grosgrain into two 2” Lengths. Fuse the ends with a flame.
- Cut the 3/32 shock cord into two 8” pieces and one 70” piece. Fuse the ends with a flame.
Sewing Instructions
**Seam allowances should be 1/4" unless otherwise noted**
Step 1: Roll hem the top(longest) edges of the two pieces of noseeum.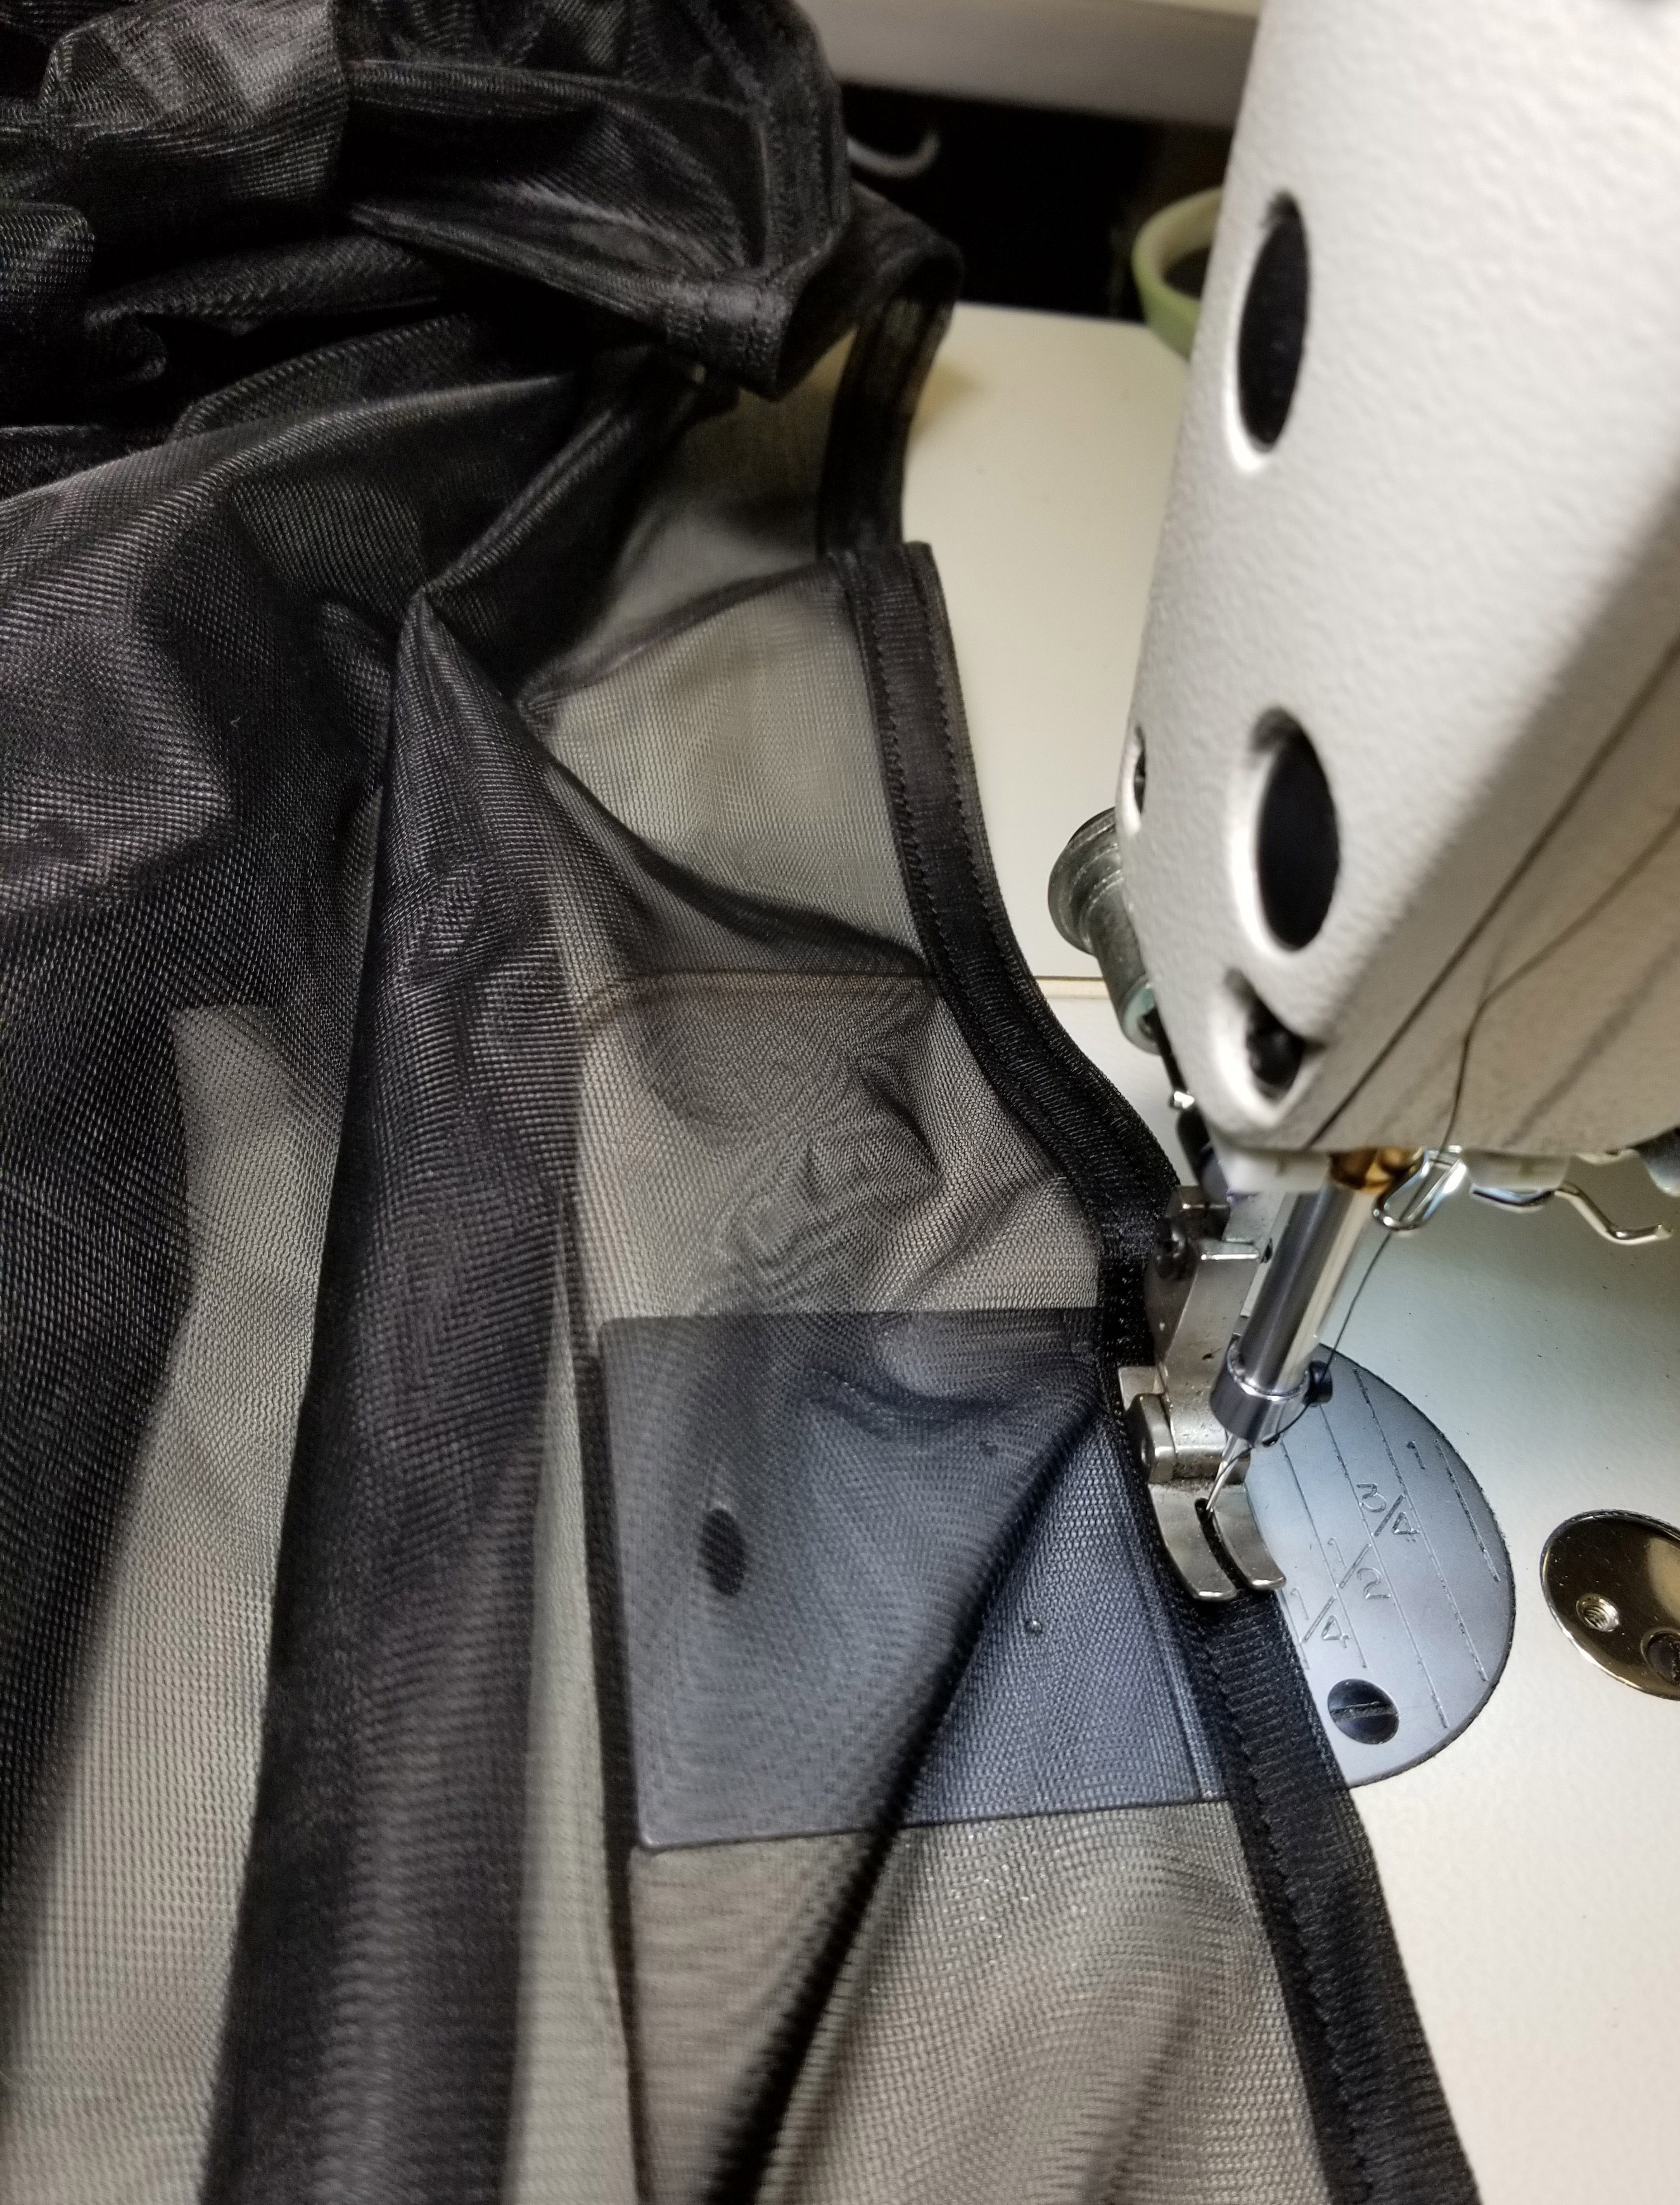 Step 2: Lay the bugnet out flat. Single needle the 10” pieces of 1” grosgrain to the end of the bugnet. The grosgrain should be stitched on to the side opposing the roll hem you just made in the previous step. Trim the edges of the grosgrain flush with the edges of the noseeum. Repeat this step on the other end.
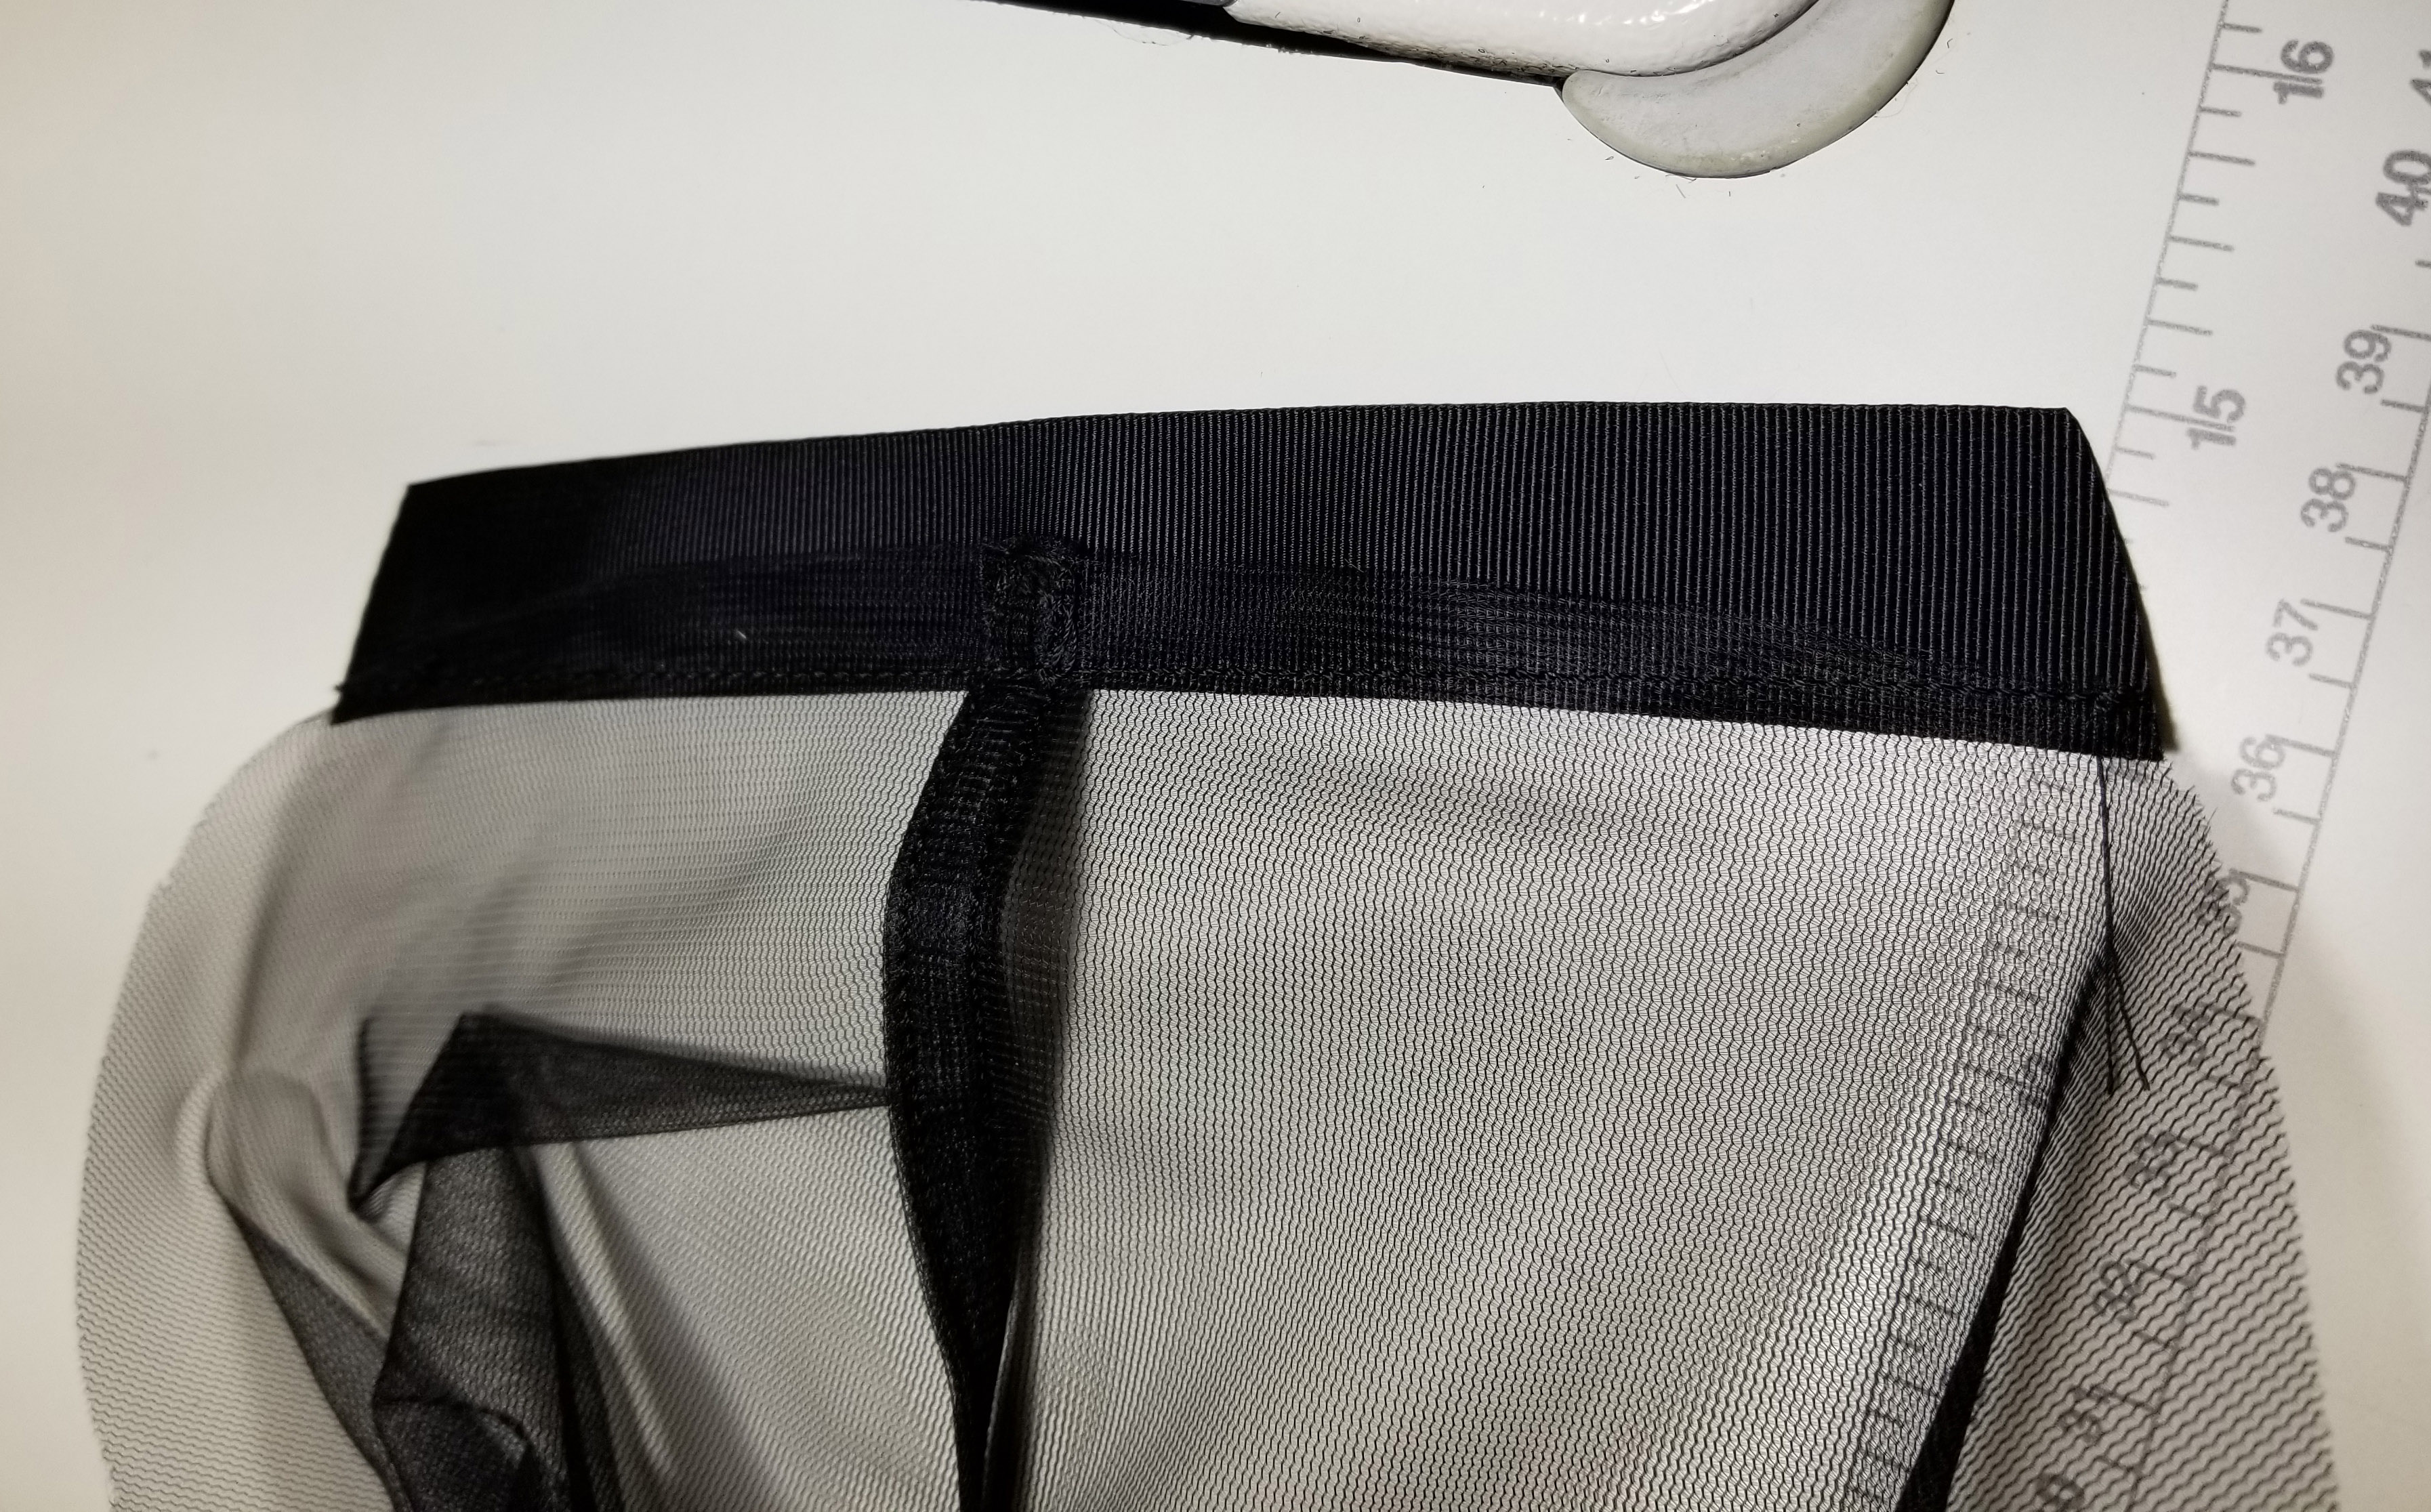 Step 3: Fold the bugnet in half again so that the roll hem at the top is on the exterior. Double needle stitch down the angled sides of the bugnet. Repeat this step on the other end.
 Step 4: Turn the bugnet right side out.
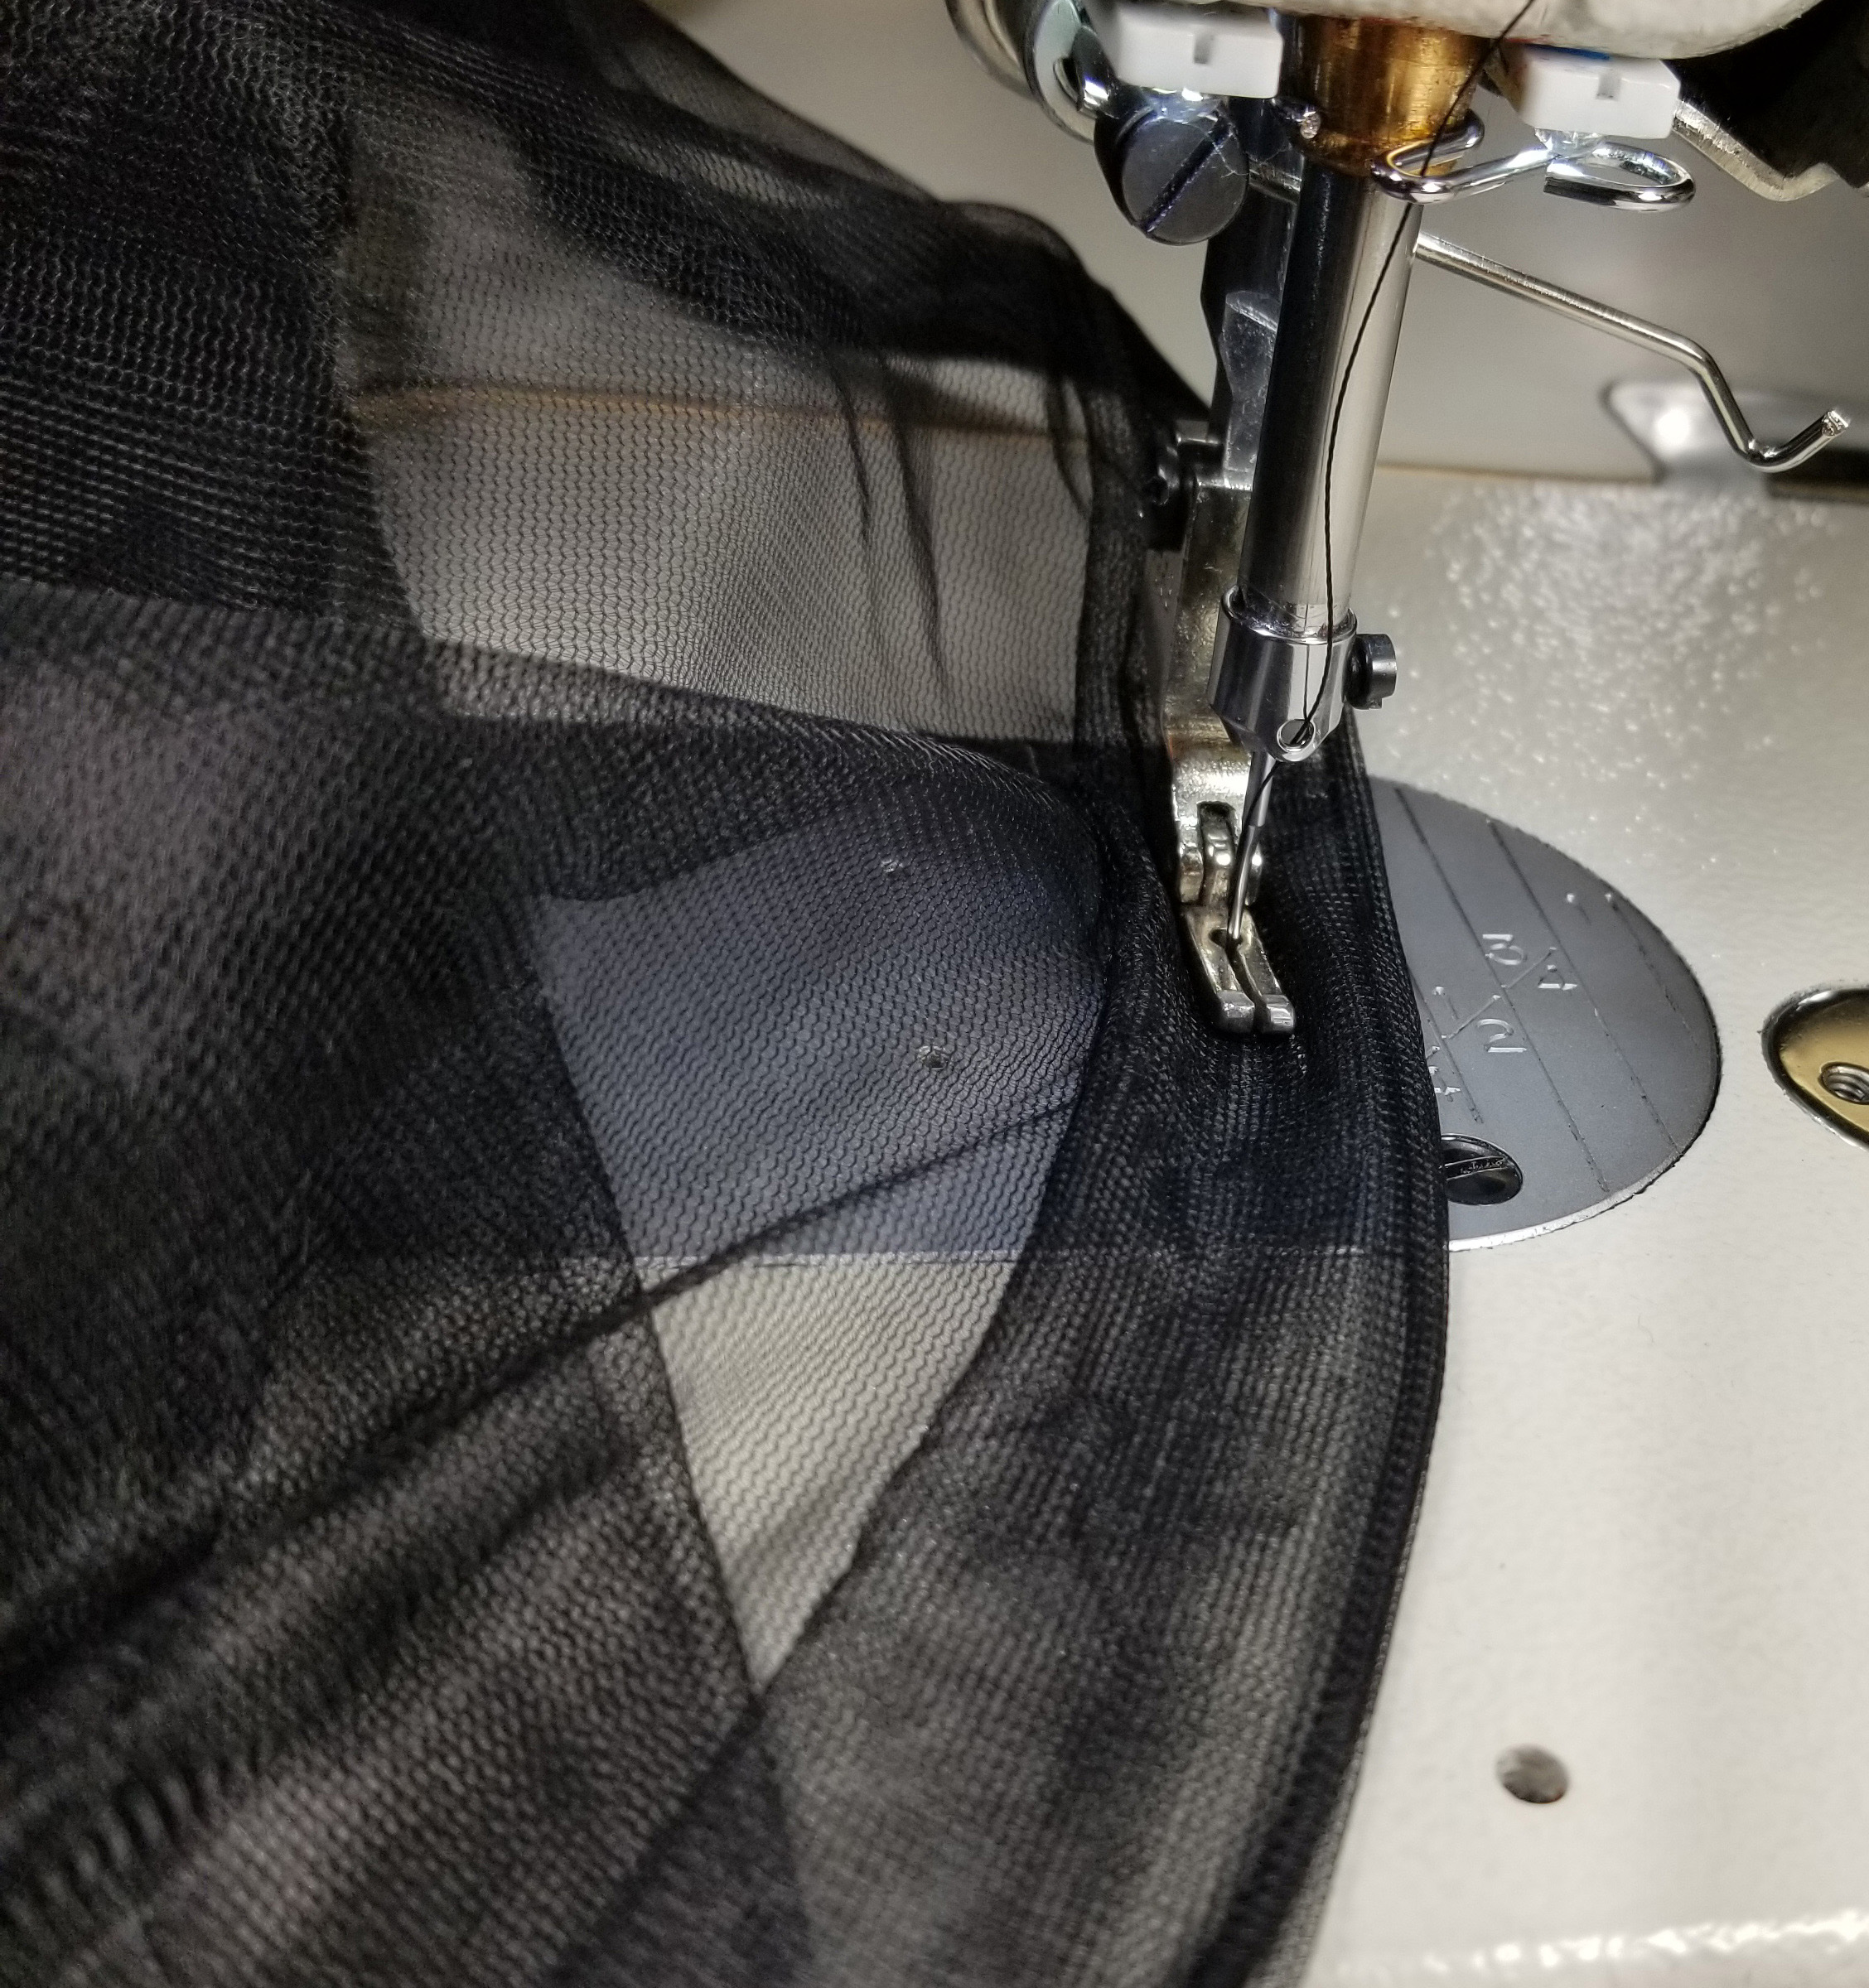
Step 5: Next finish the grosgrain ends of the bugnet. The 3/32” shock cord will need to be stitched into the tunnel as it is created. To do this leave a few inches of the shock cord out as you being sewing. Start your stitch about ¼” past the double needle side seam. Slowly fold the grosgrain over the shock cord and stitch your way around the tunnel.
Stop about ¼” before the side seam to leave about ½” opening for the shock cord. Repeat this step on the other end. *NOTE* Threading the shock cord through this tunnel is nearly impossible after its sewn.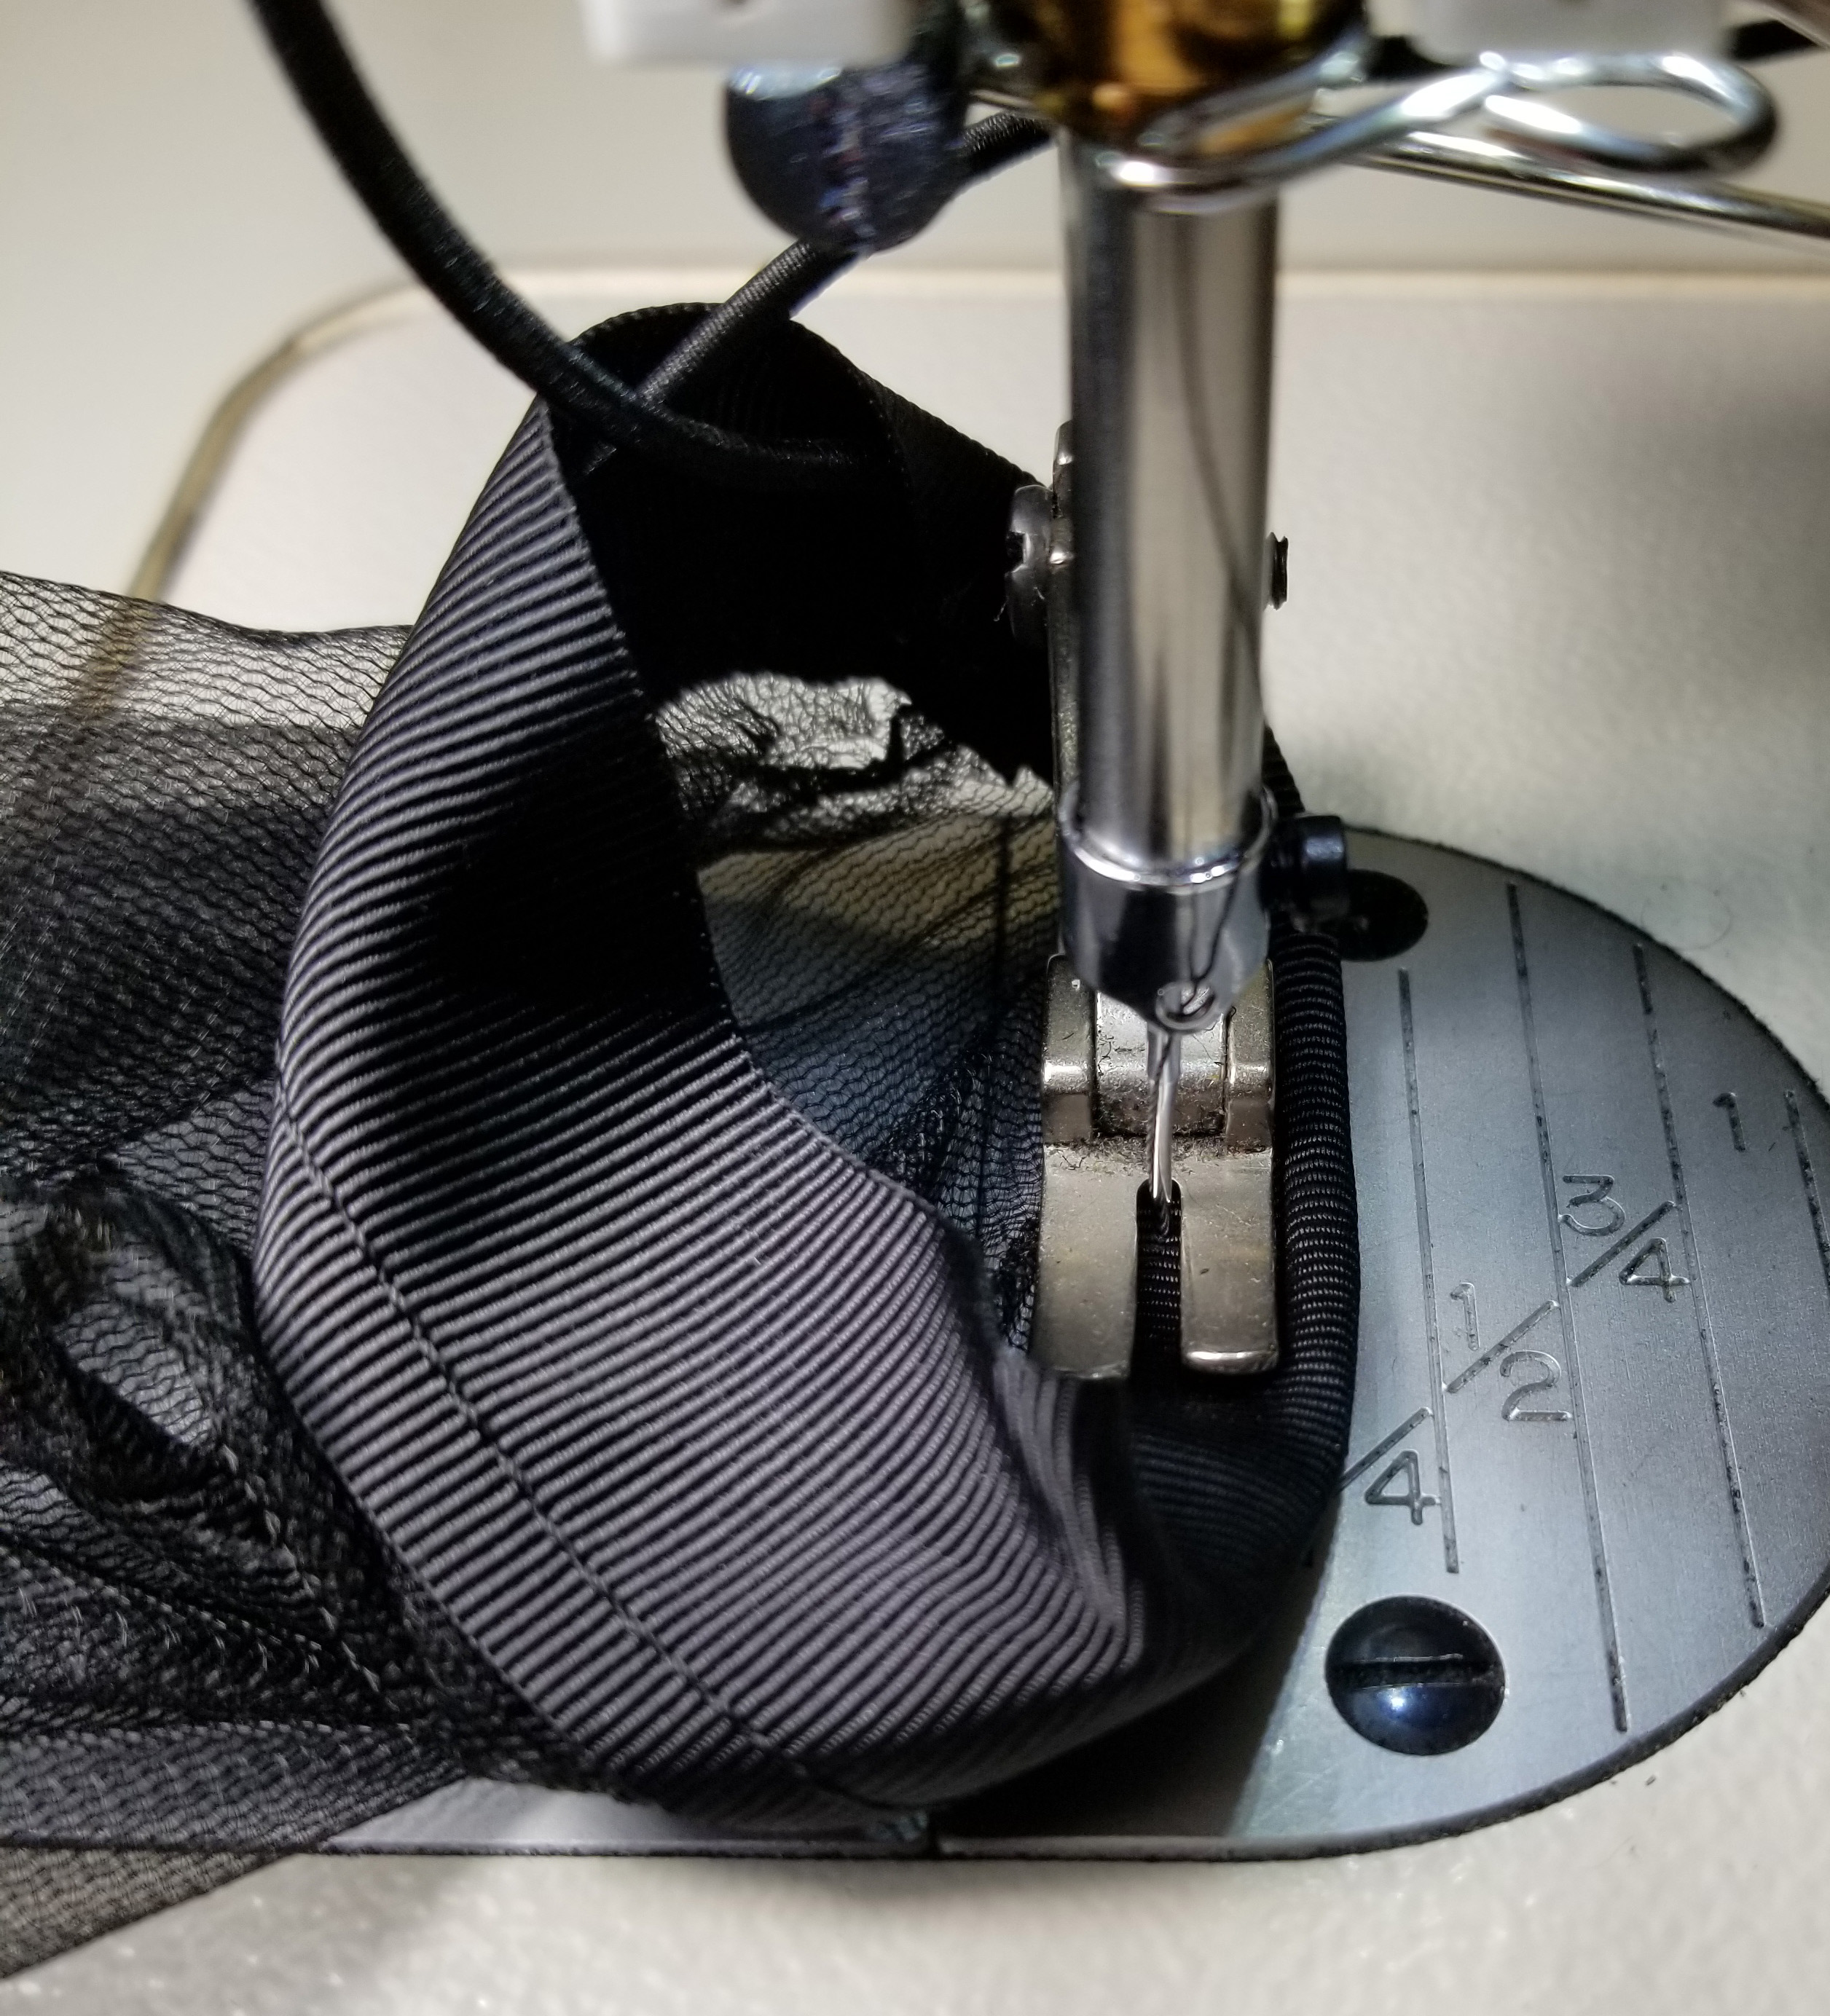

Step 6: Thread a cord lock over both ends of the shock cord. Tie an overhand knot in both ends to keep it from slipping off. You can trim and fuse the ends of the shock cord at this point. Repeat this step on the other end. Step 7: Thread a mitten hook onto one 2” Piece of 1/2“ grosgrain. Stitch this onto the tunnel you have just created so that it makes a loop. Position this loop in line with the top rolled hem of the bug net. Stitch back and forth across it a few times to be sure its securely attached. Repeat this step on the other end.
Step 8: Starting at one of the notches in the bottom edge tunnel the 70” long piece of 3/32 shock cord into a 1” rolled hem. I find that it is easier to sew the shock cord in as you sew the tunnel than it is to try to thread it through later. You may want to tie the end of the shock cord to a pencil or some other object to keep it from pulling through as your noseeum bunches up.
Leave about ½” gap at the start and stop of your stitch to serve as an exit point for the shock cord.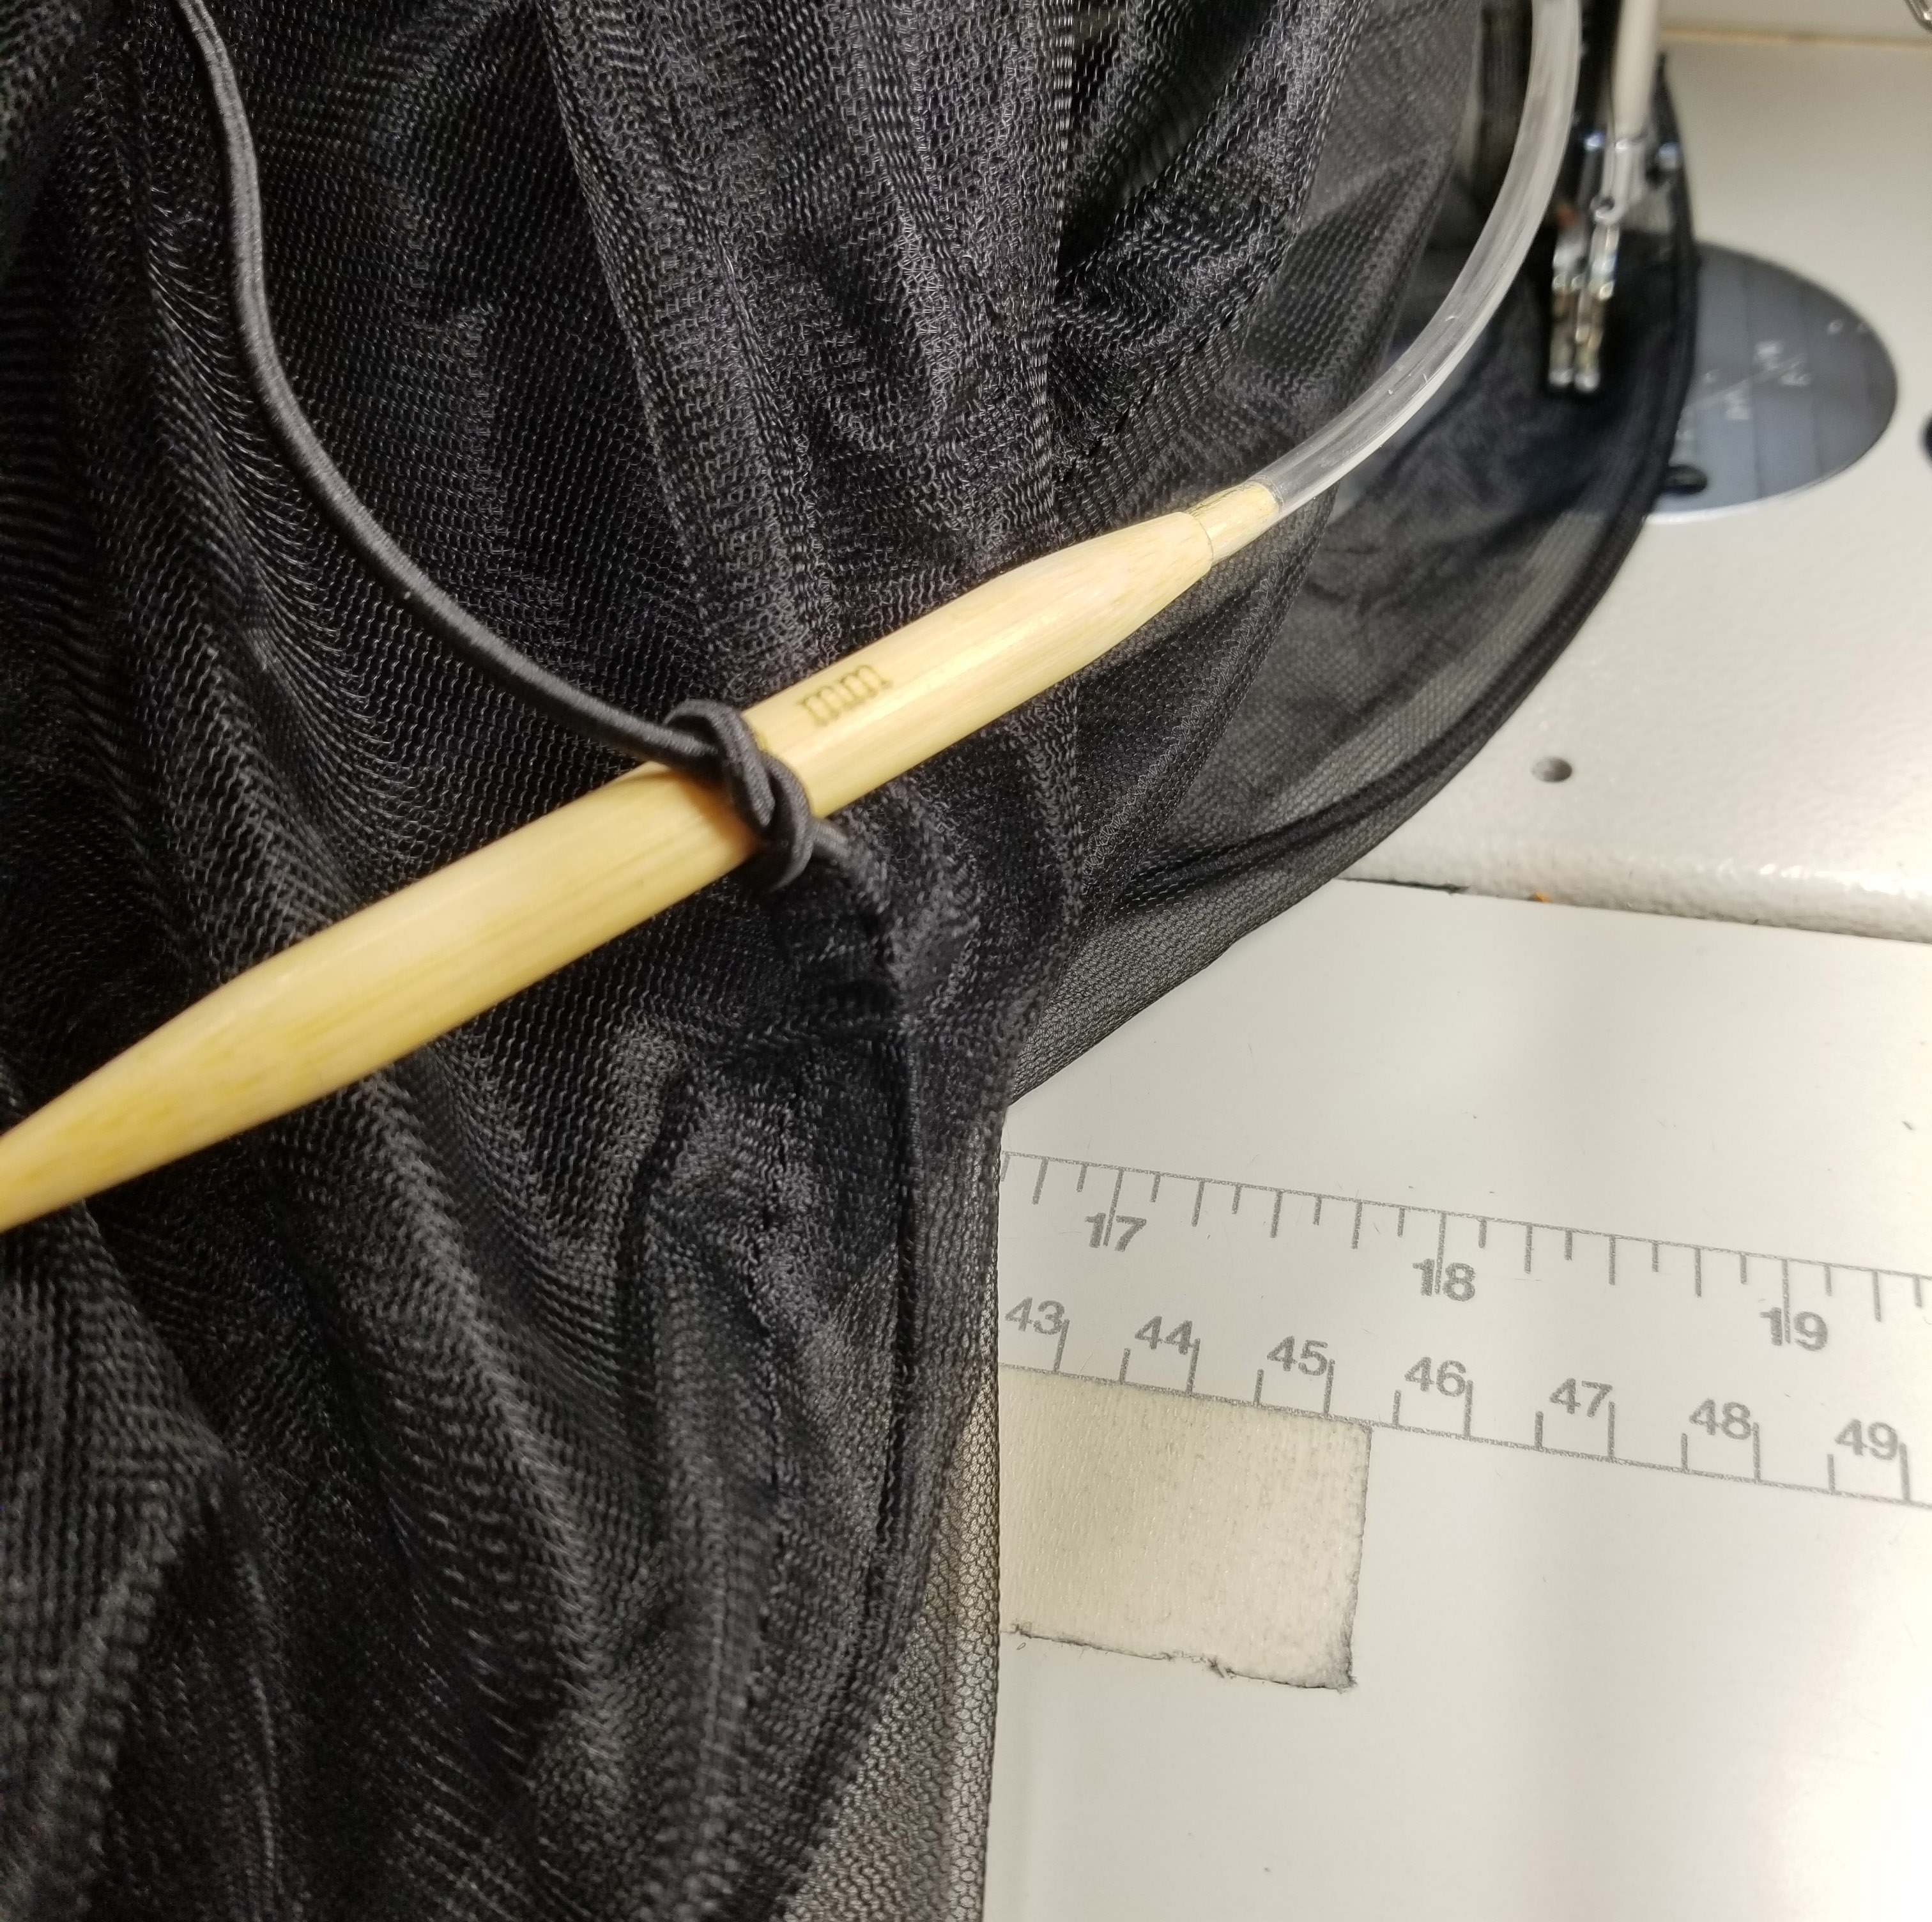
 Step 9: Once the tunnel is sewn along the whole bottom edge slip the two ends of the shock cord through a cord lock and tie them in an overhand knot.
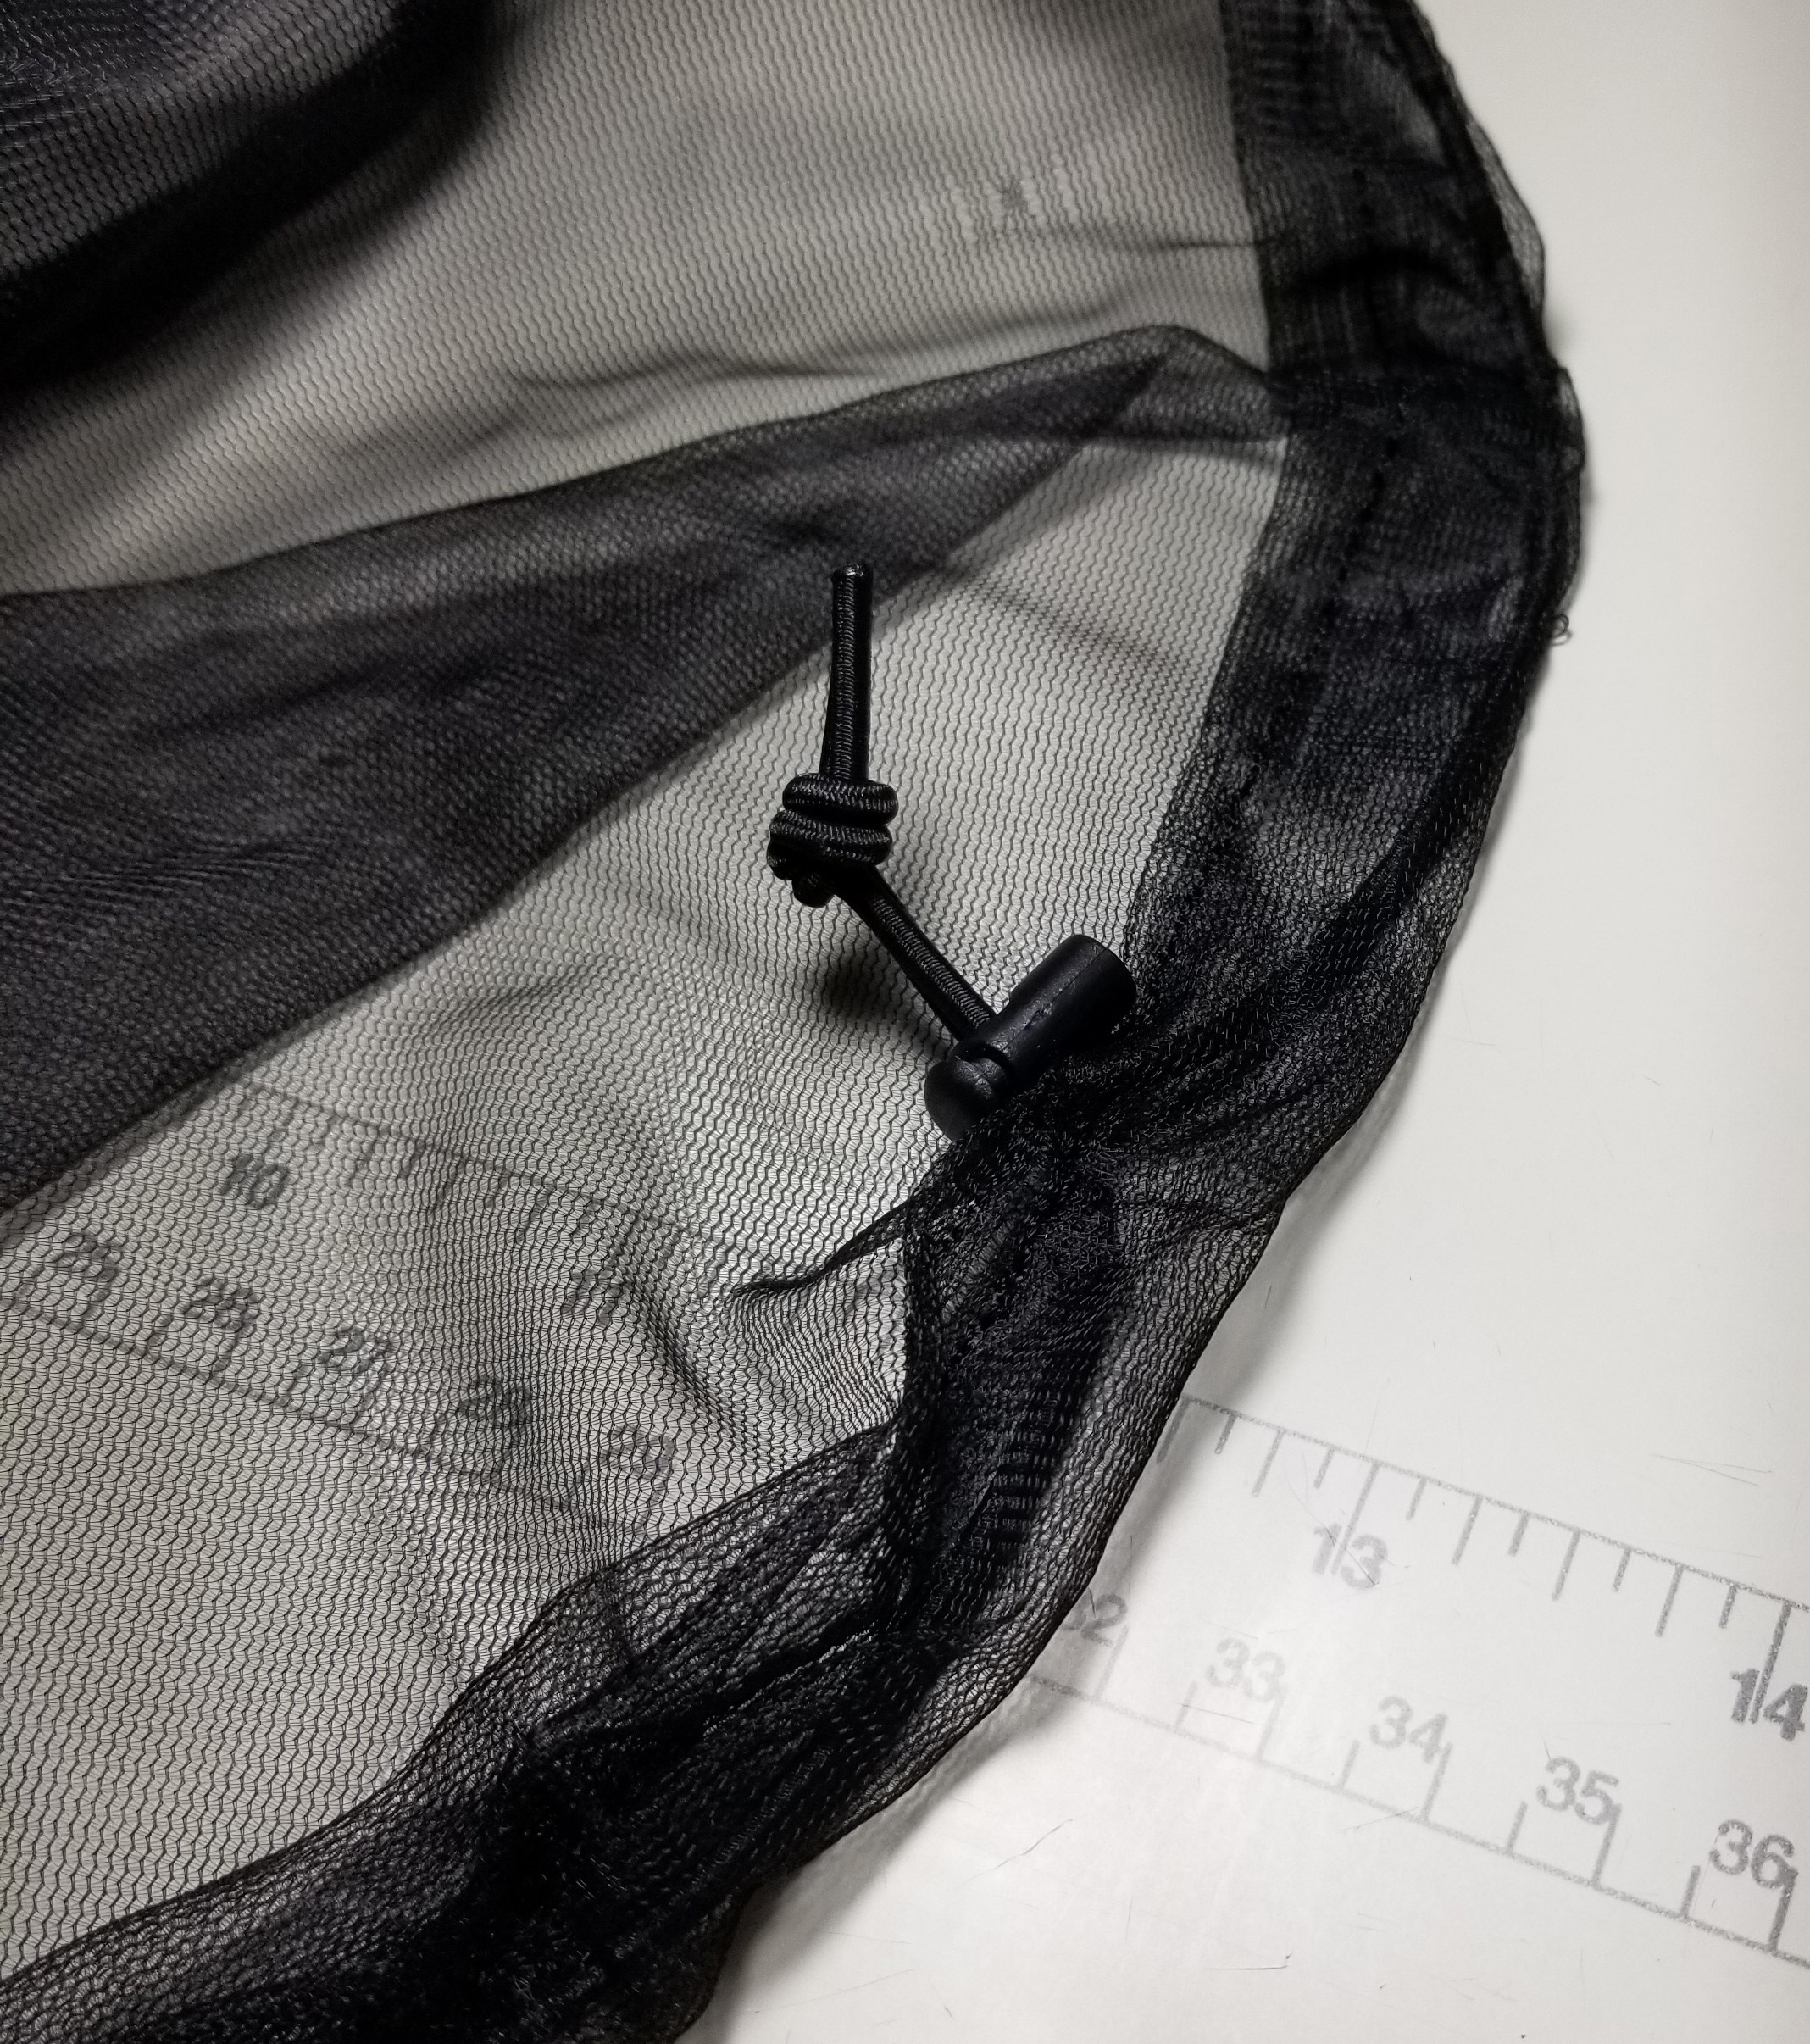 Step 10: Enjoy your new gear!