

DIY Horizontal Compression Stuff Sack
Posted by Dutch on Oct 10th 2023
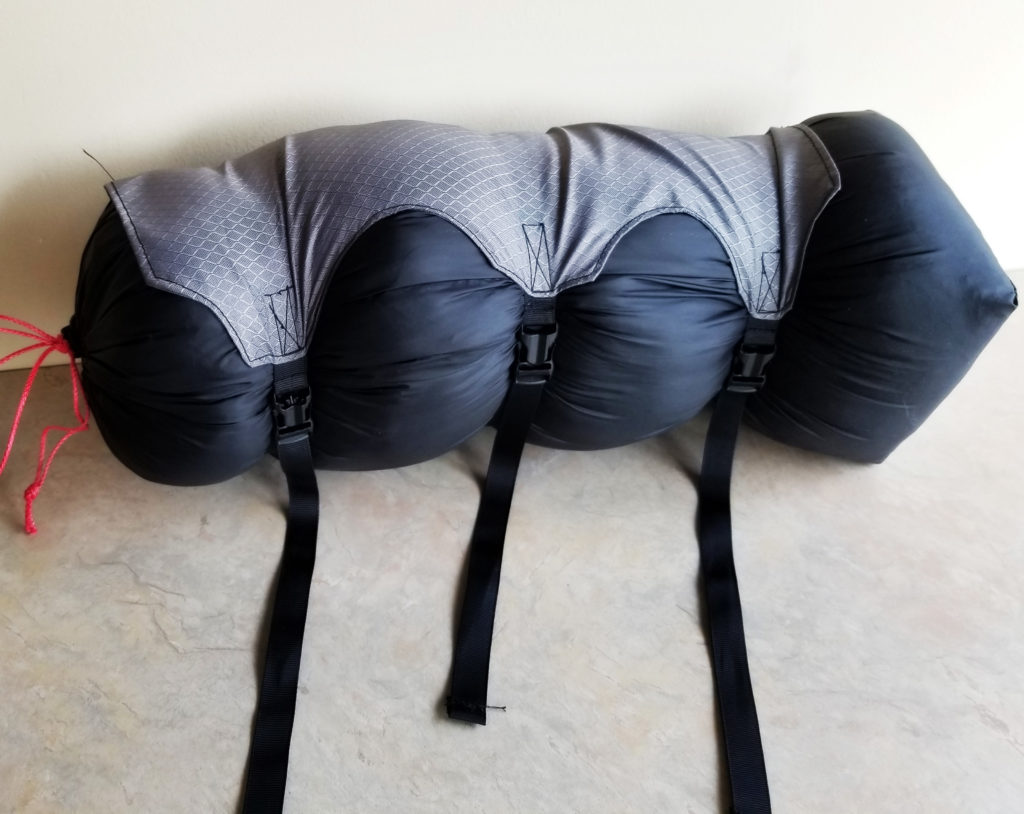
Share:In this tutorial article we will show you how to make your own DIY compression stuff sack
This stuff sack is lightweight and serves as great storage for hammocks, quilts, clothes or any compressible items. This is a larger stuff sack, compression is horizontal along the length of the stuff sack. Compresses on the short side in several spots.
Project Overview
| Skill Level | Estimated Time | Estimated Cost |
| Beginner | 1-2 hours | $ |
Materials and Tools
| Materials Needed: | Tools Needed: |
| 1 Yard Fabric | Sewing Machine |
| 1/2 Yard 300D Reinforcement | Scissors |
| 3 Feet Zing It 1.75 | Ruler/Tape Measure |
| 5 Feet 5/8" Grosgrain Webbing | Marker or Chalk |
| 3 Side Release Buckles(Webbing Adjustment) | Compression Stuff Sack Template |
Preparation Instructions
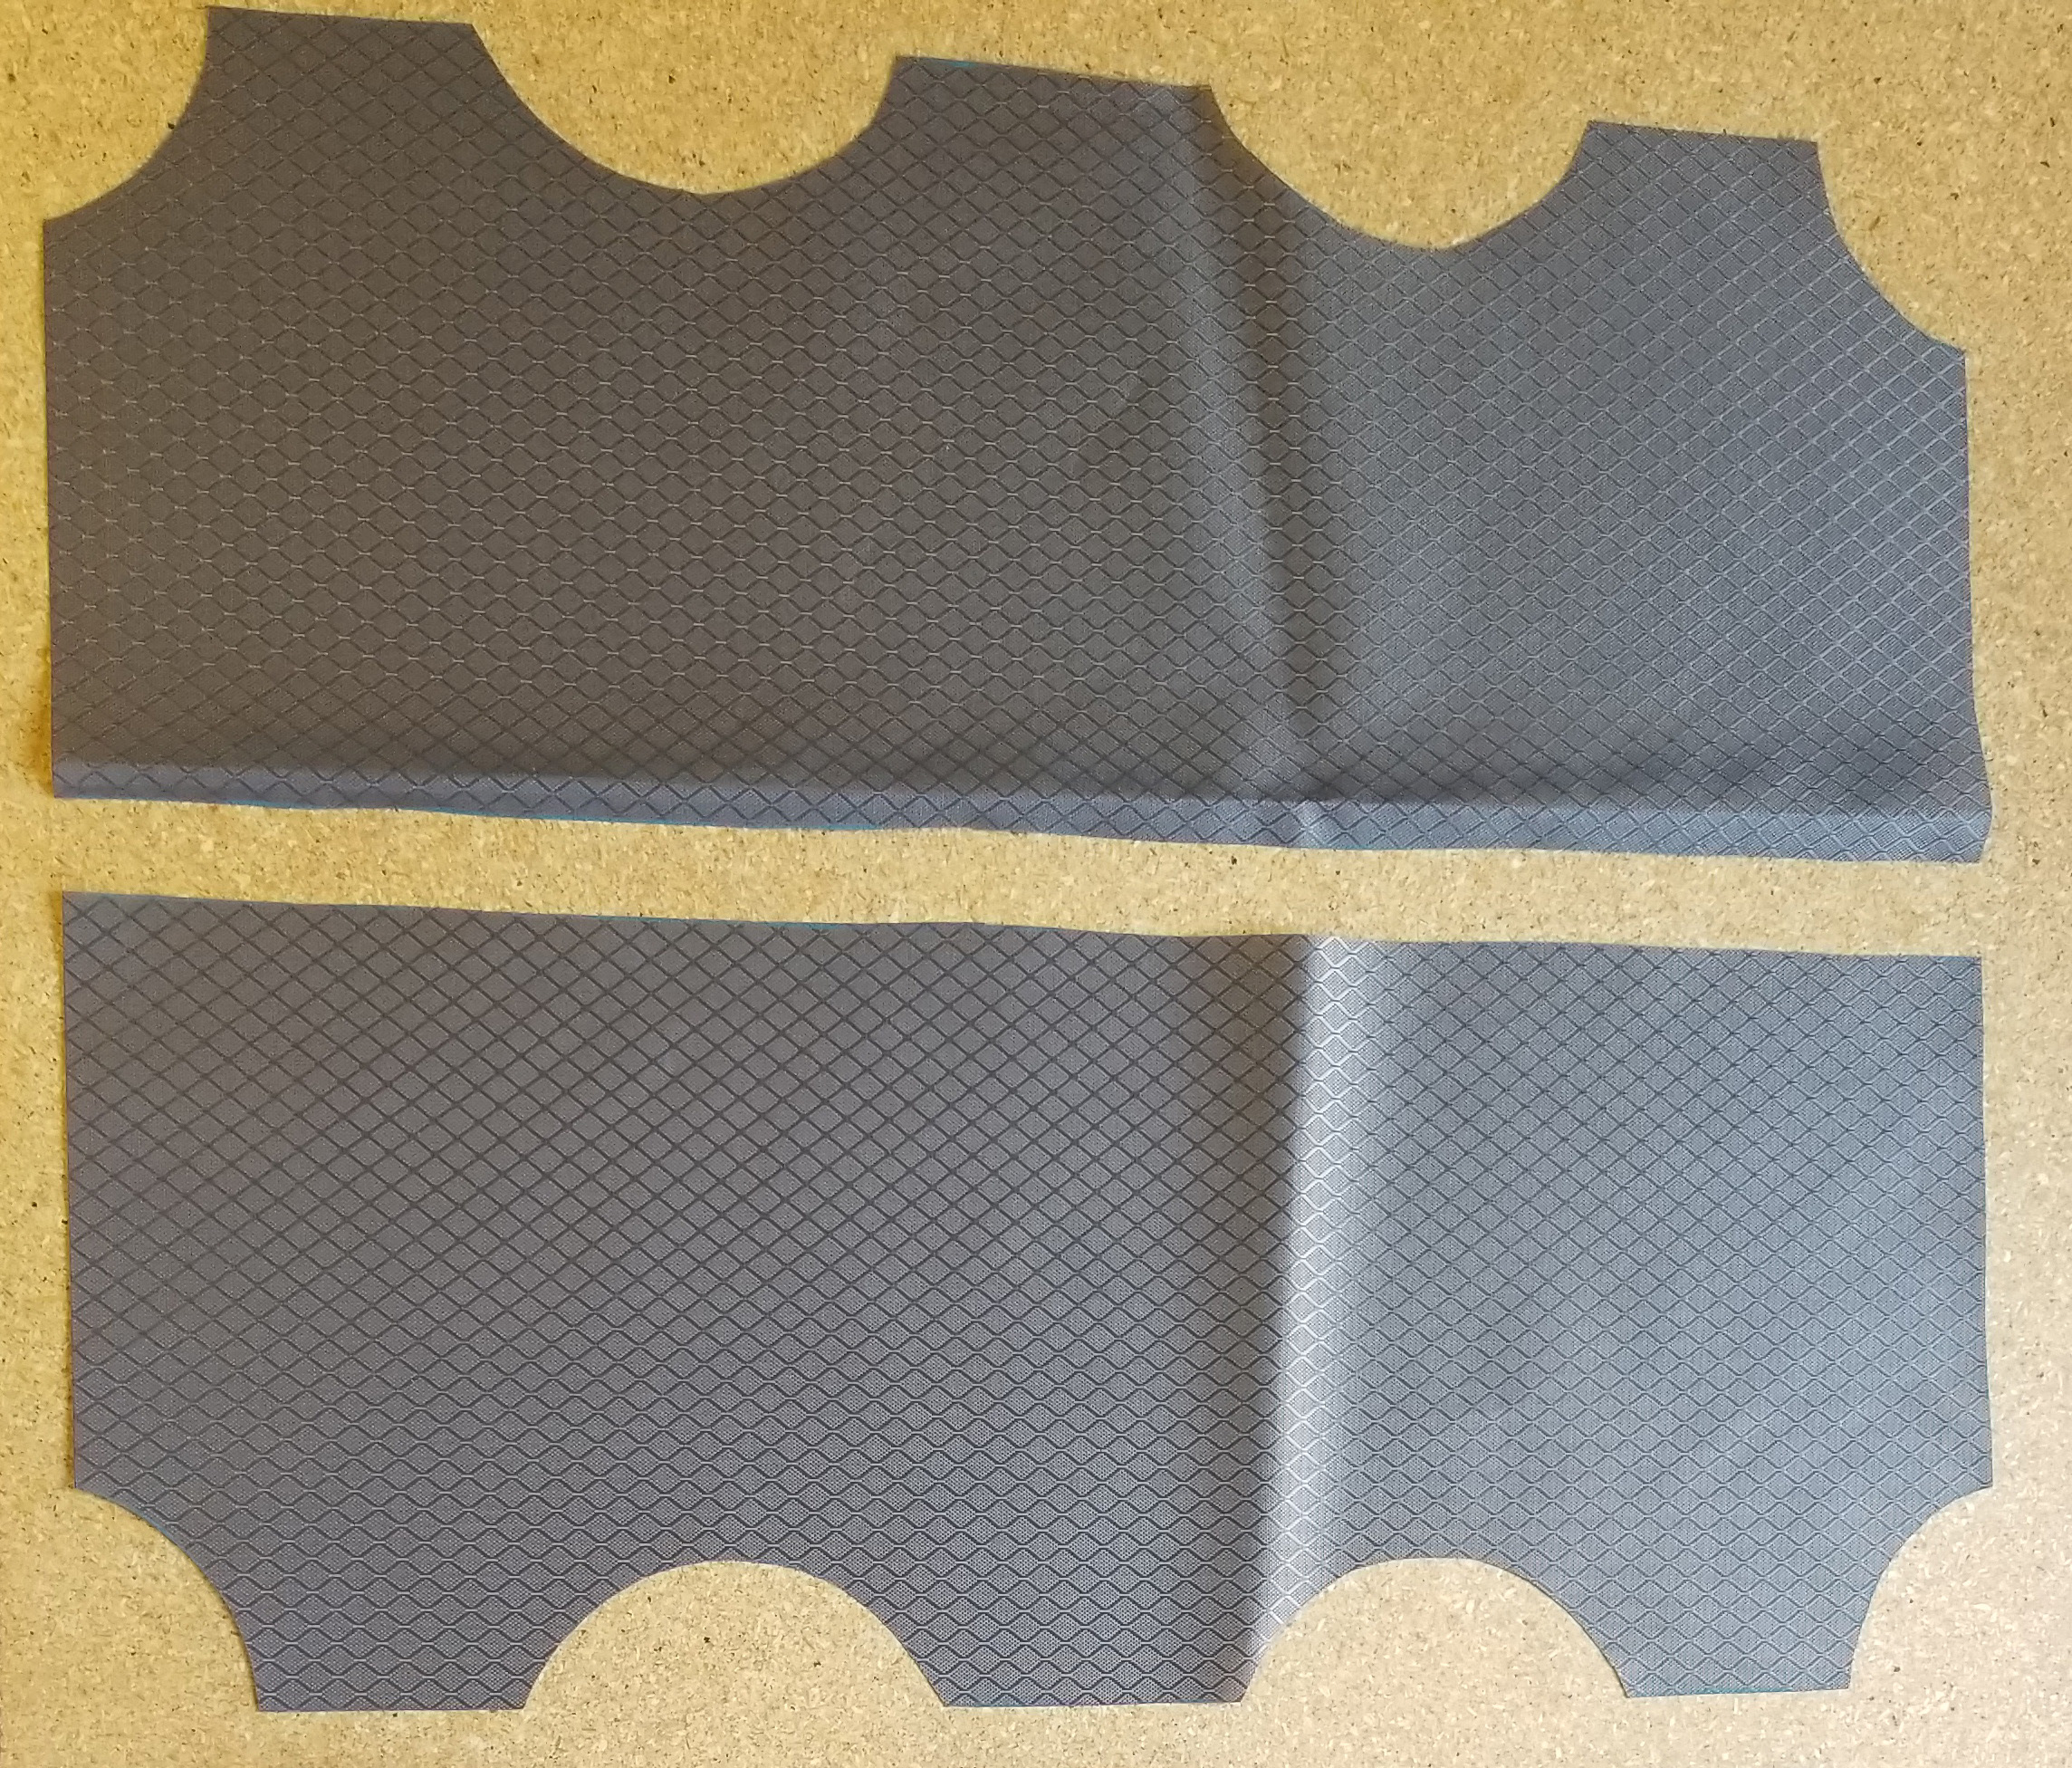
- Prepare a pattern using the included Compression Stuff Sack Template. You can either print two and tape the halves together or use one and flip it over to get a completed “wing piece”
- Trace the pattern using tailors chalk or a marker. You will need a quantity of 4 of these pieces. Cut the wing pieces to size out of the 300D reinforcement fabric.
- Cut a 20" wide by 24” tall rectangle out of the provided piece of xenon
- Cut a 3" wide by 24” tall rectangle out of the provided piece of xenon
- Cut 3 pieces of 5/8" grosgrain webbing 4" long each and fuse both ends carefully with a flame
- Cut 3 pieces of 5/8” grosgrain webbing 15" long each and fuse both ends carefully with a flame
Sewing Instructions
**Seam allowances should be 1/4" unless otherwise noted**
Step 1
Separate the wings into pairs. Align each set of wings so that the good sides of the fabric pieces are inwards. This means the outsides of each pair should be the shinier, coated side (wrong side) of the fabric.
 Step 2
Thread each piece of grosgrain webbing that you cut to 3” in length with a single female side release threaded on each loop. I like to sew a line of stitching close to the side release buckle in the webbing to keep it from shifting throughout the rest of the process.
Step 3
Center each loop you’ve just created in each flat area between the curves on the wings with the female side release in between the pieces of 300D and it should be set with 1¼” of grosgrain protruding beyond the wings. 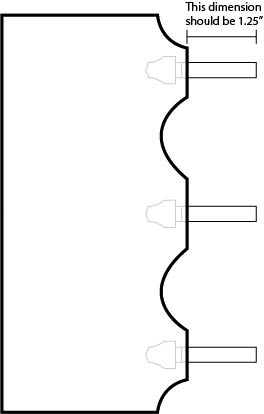
Step 4
Center the ends of each of the 15” pieces of grosgrain into the other pair of wings. These should be centered in each flat area on the wings and should be set with 1¼” of grosgrain protruding beyond the wing 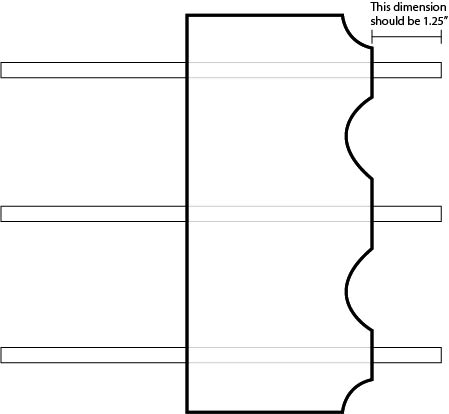
Step 5
Stitch around the sides and curved cut area of the 300D. Do this for both wings. The area that should be stitched is illustrated by the red line in the diagram. 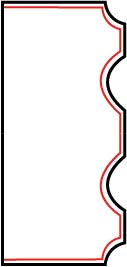
Step 6
Cut approximately 5 notches up to the stitching on all of the curved areas of the wings. Do this for both wings. 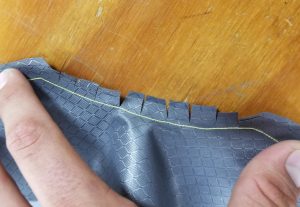 Step 7

Turn the wing pieces right side out.
Step 8
Top stitch around the sides and curved area of both wings creating a finished hem on 3 sides. For this step I prefer a tight 1/8” seam allowance. Do this for both wings. 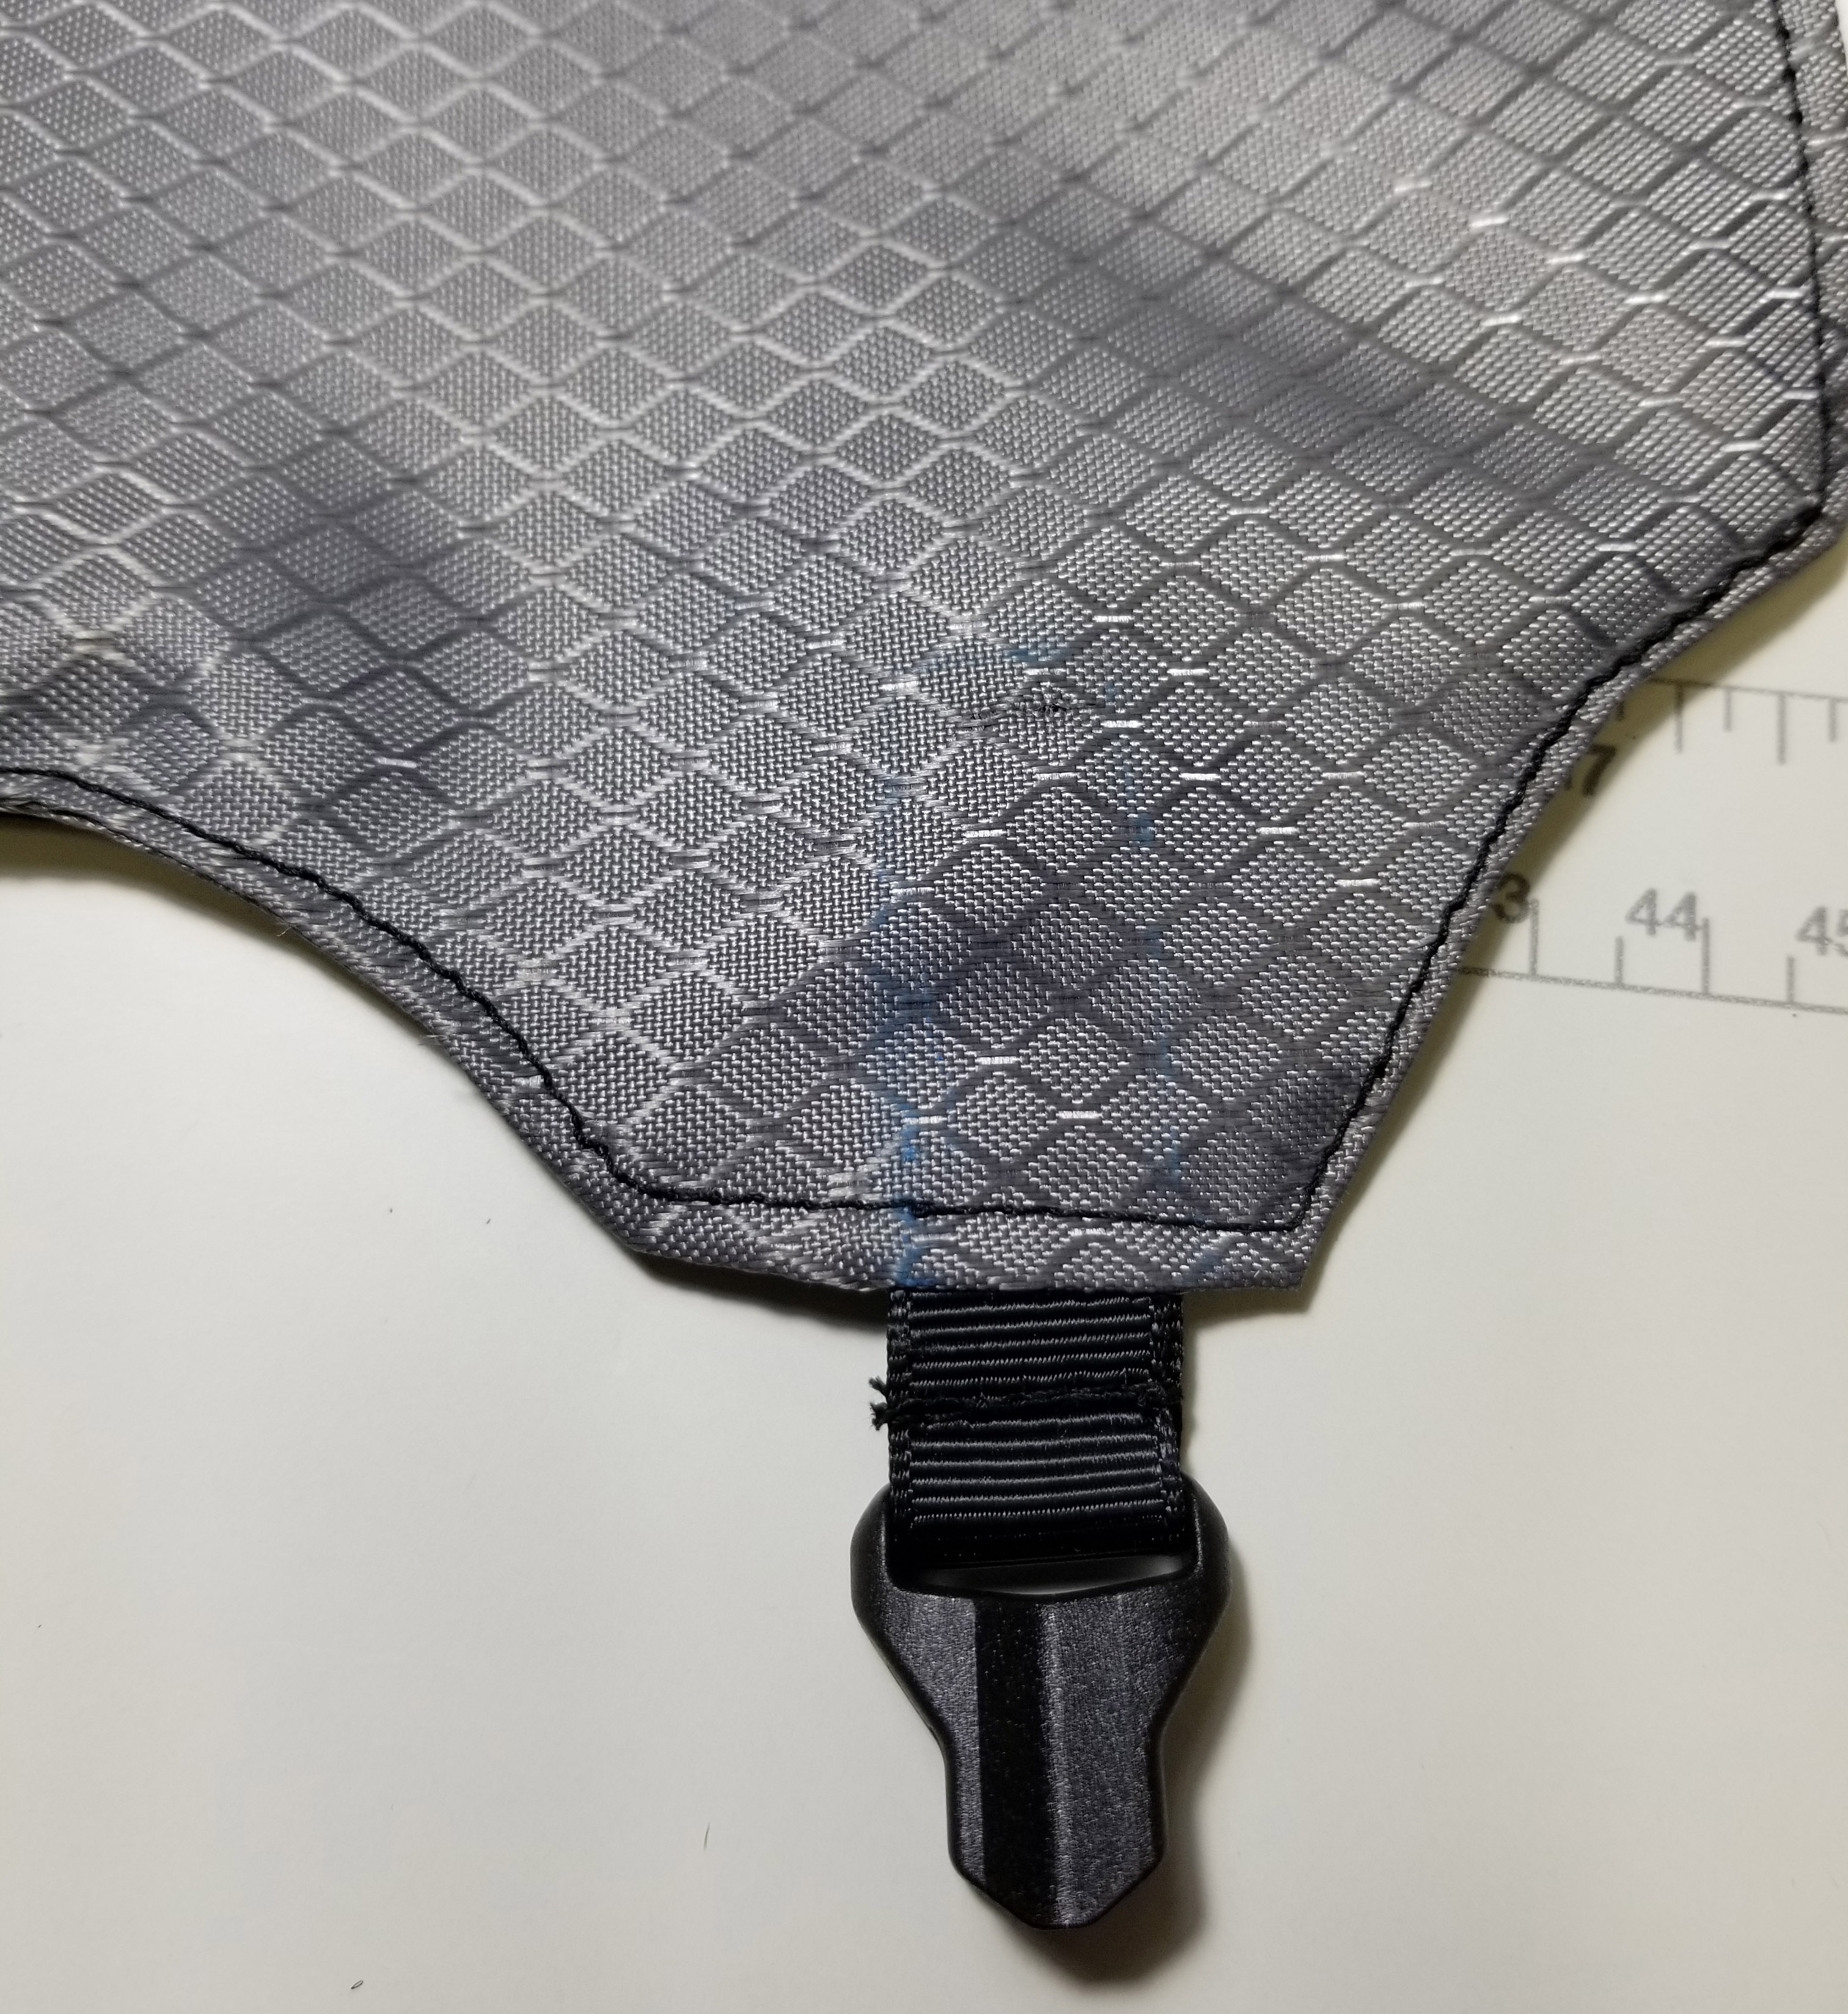
Step 9
Trace the pieces of grosgrain inside of the wings using chalk or some washable marker. You will need to find the location of the grosgrain webbing by feel. Stitch a reinforcing X-box as pictured below. 
Step 10
Stitch the finished 300D pieces to the sides of the 20" wide rectangle these should be positioned 4" up from the anticipated bottom of the stuff sack. These “wings” should be placed with the unsewn edges to the edge of the rectangle of Xenon with the grosgrain facing the center of the “bag." 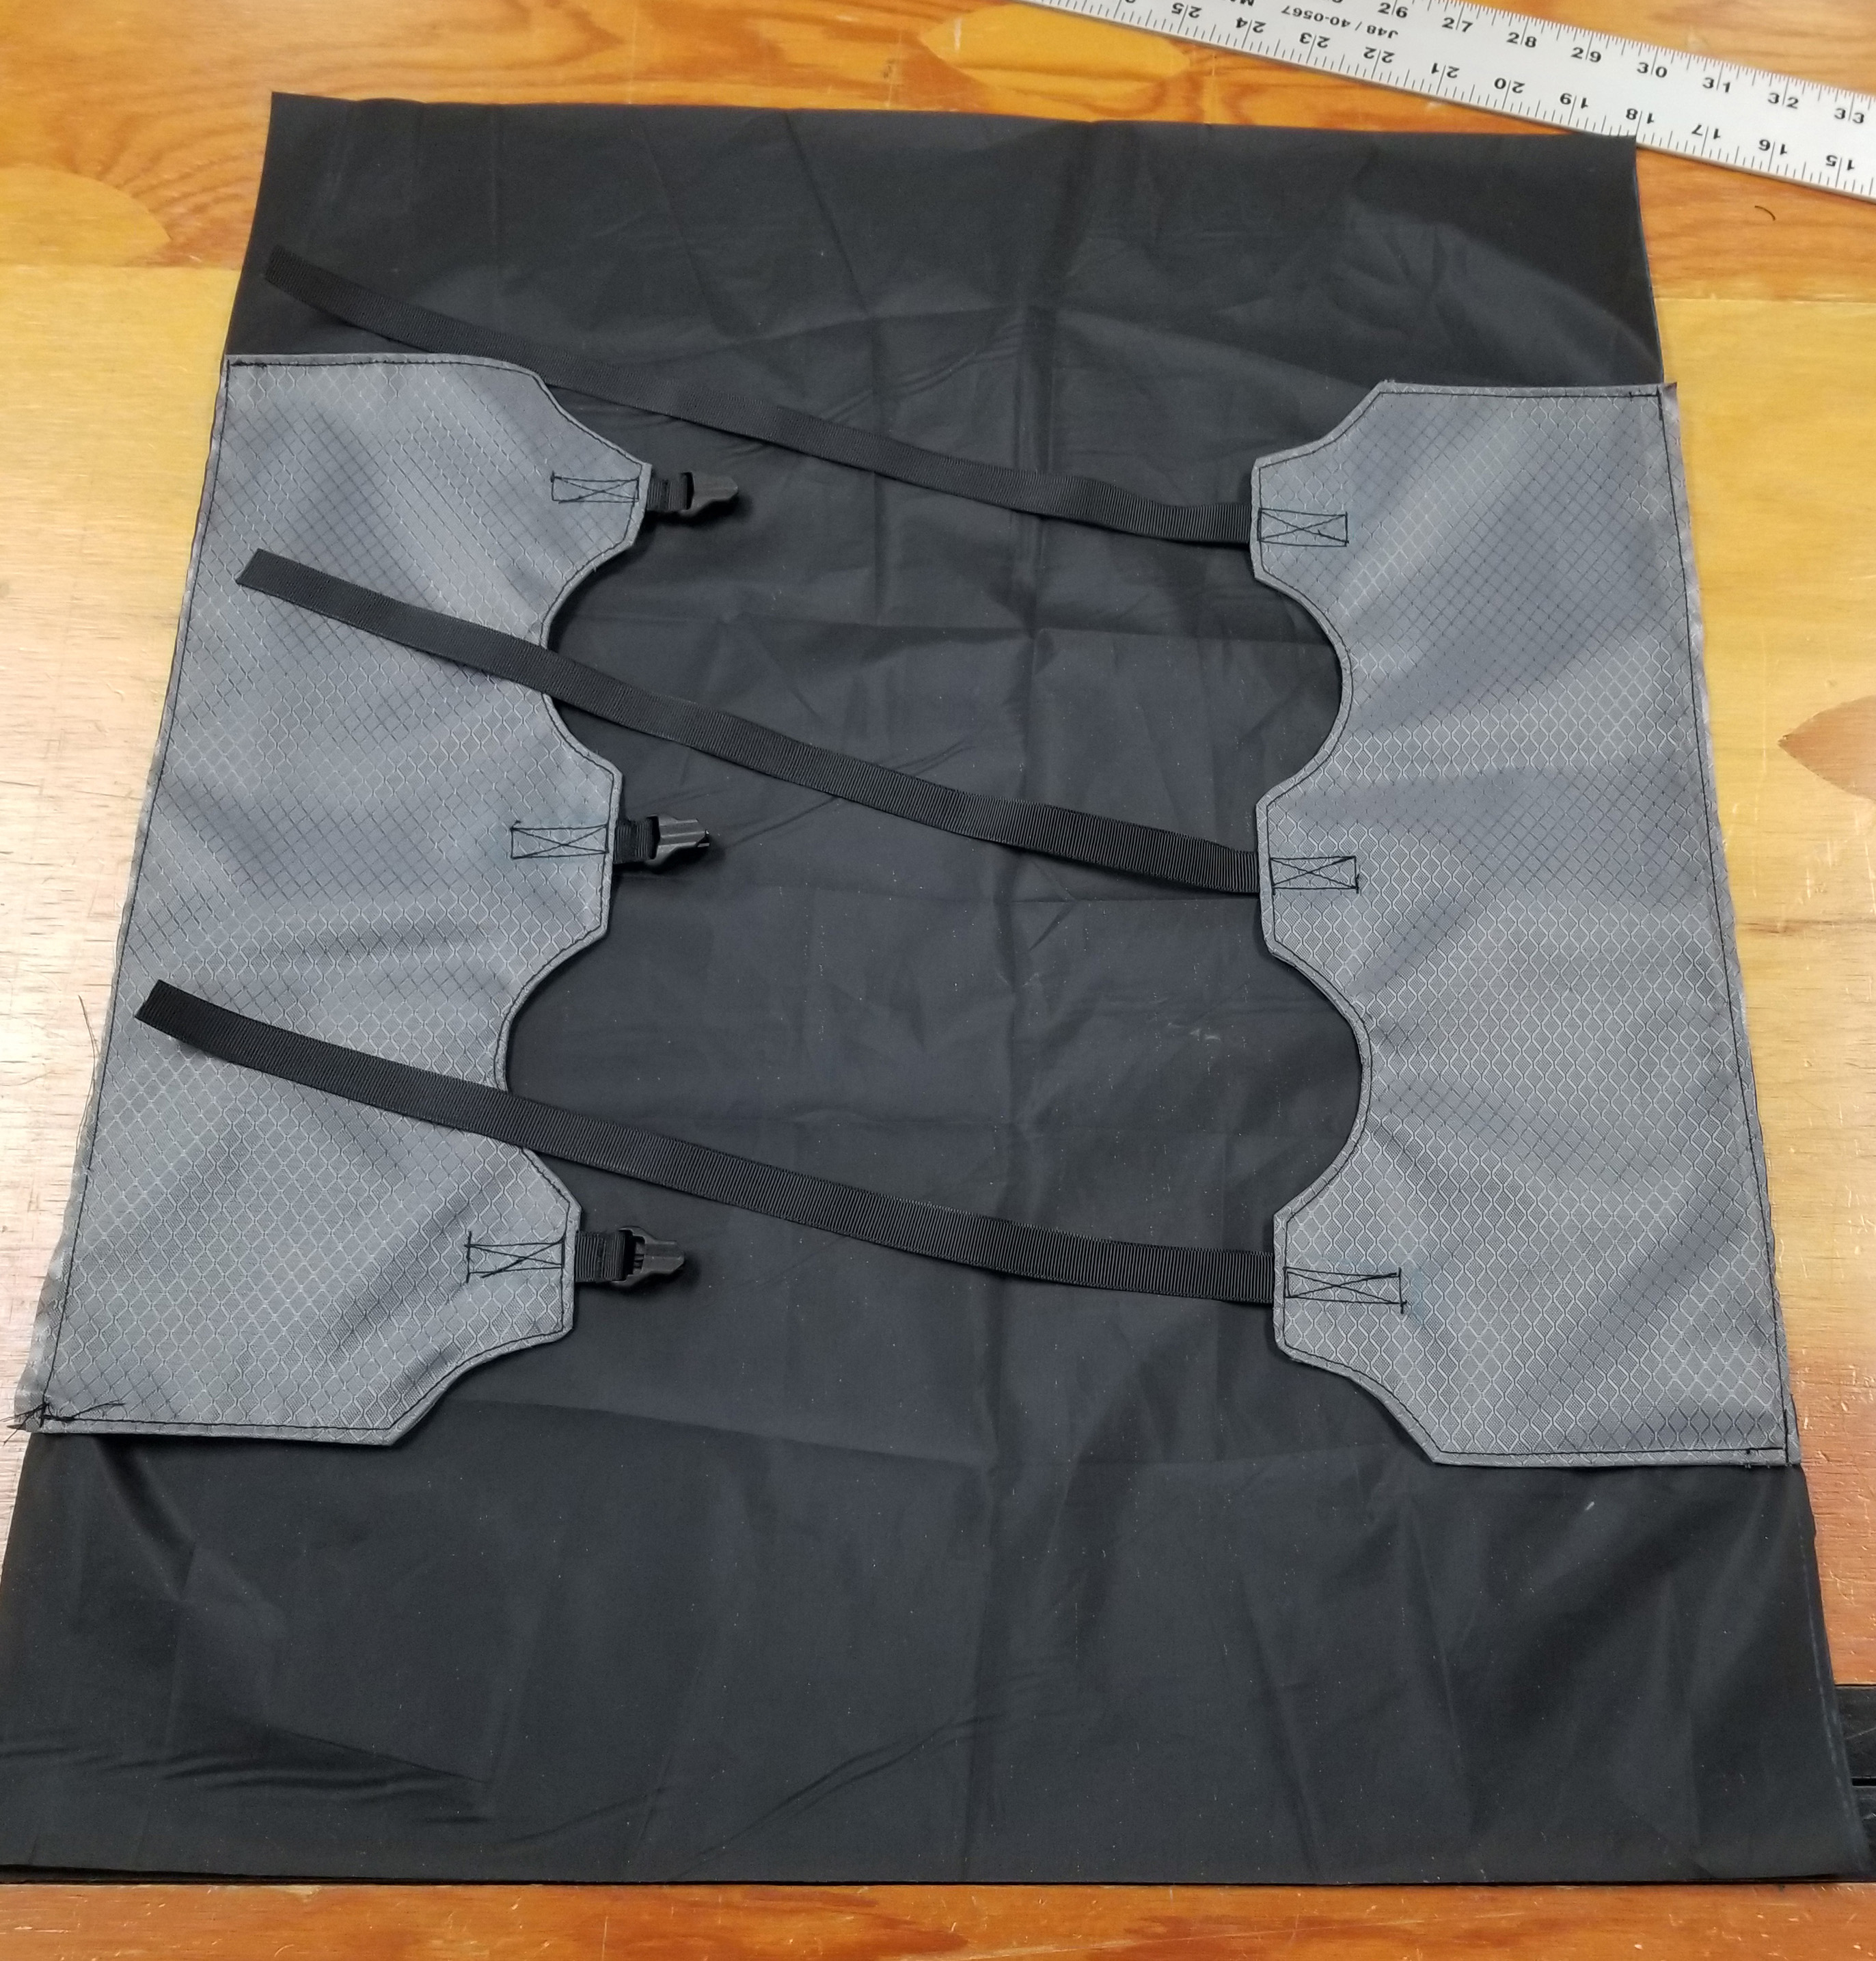
Step 11
Double stitch the 3" wide rectangle of xenon to both sides of the piece that you've just created lining it up to the top and bottom of the wider piece of xenon. This will attach the two edges making it a cylinder that will be your bag. The stitching should be done on the “inside of the bag.” I prefer to space my two rows of stitching about 1/8” apart. 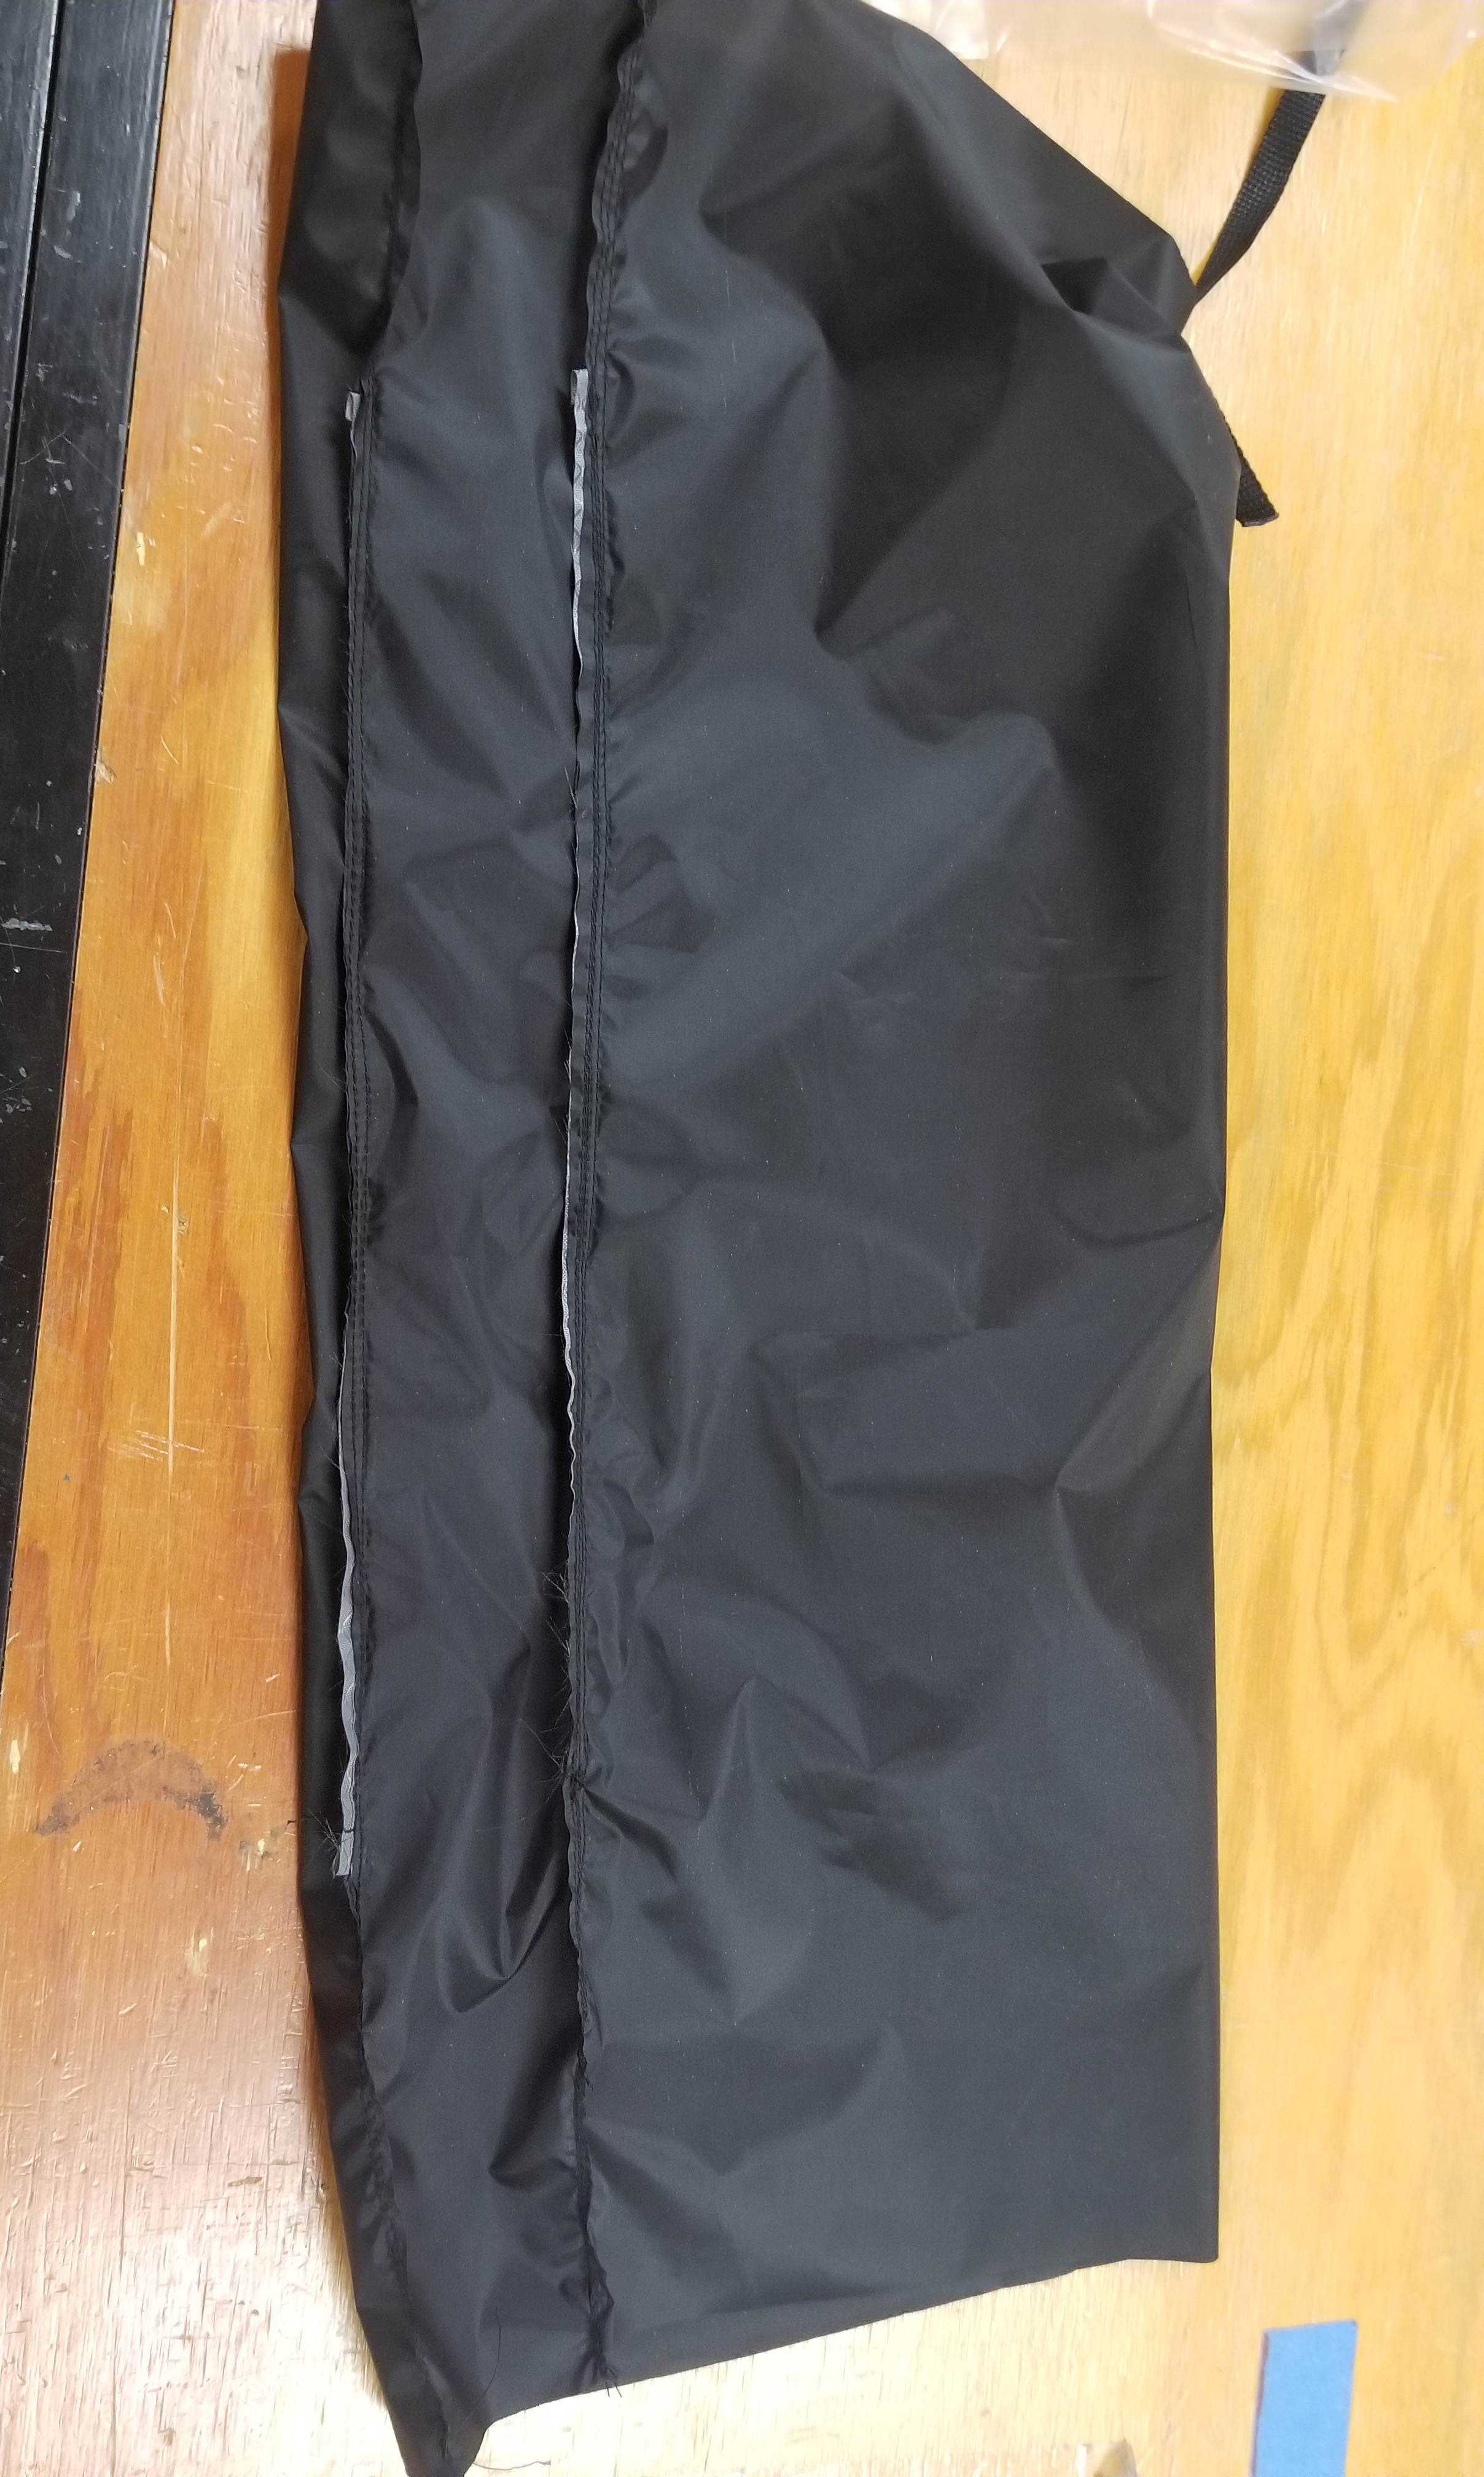
Step 12
Double stitch the bottom of the bag so that you have a finished inside out bag. The bag should be laid flat with the 3” strip of xenon centered as pictured below. Again for double stitching I prefer the two rows of stitching about 1/8” apart. 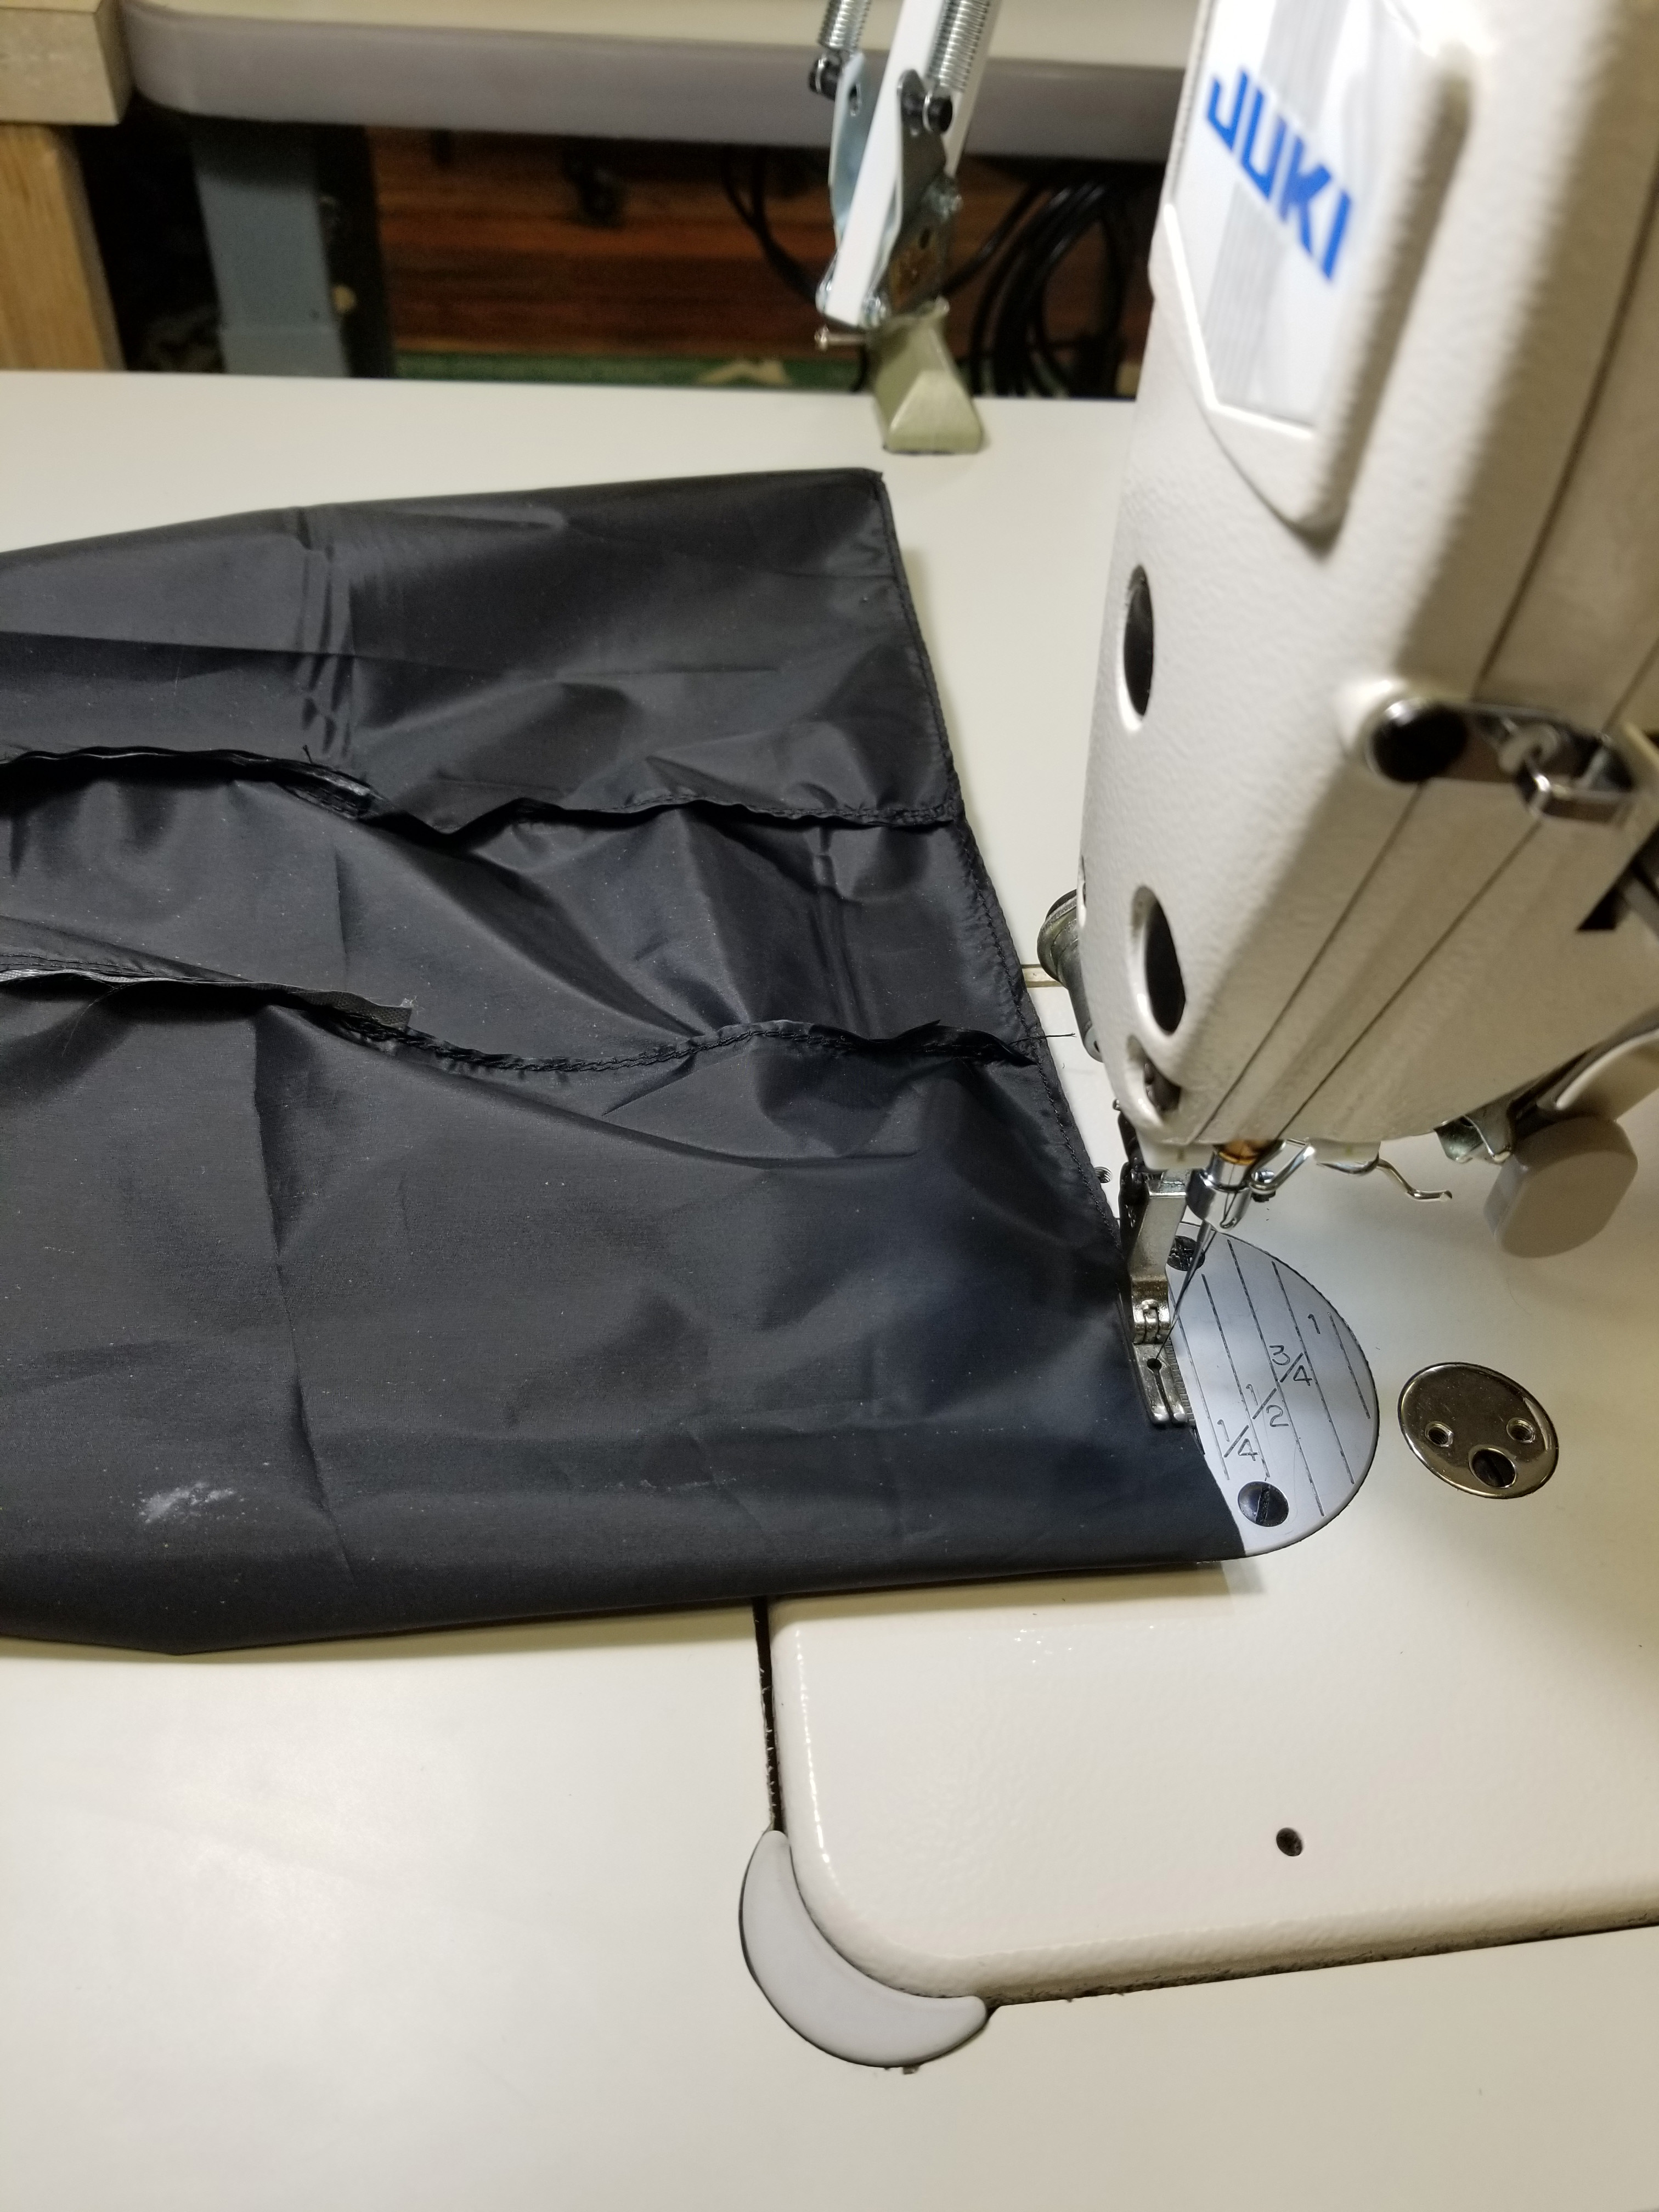
Step 13
Mark the 3” wide strip of xenon in the center. fold the bag in half along the mark that you’ve just made.
Step 14
Smooth the points that you have just created out. Trying to keep a ruler square with this point measure and mark a line that is 6" long. Flip the bag over and mark the second point. 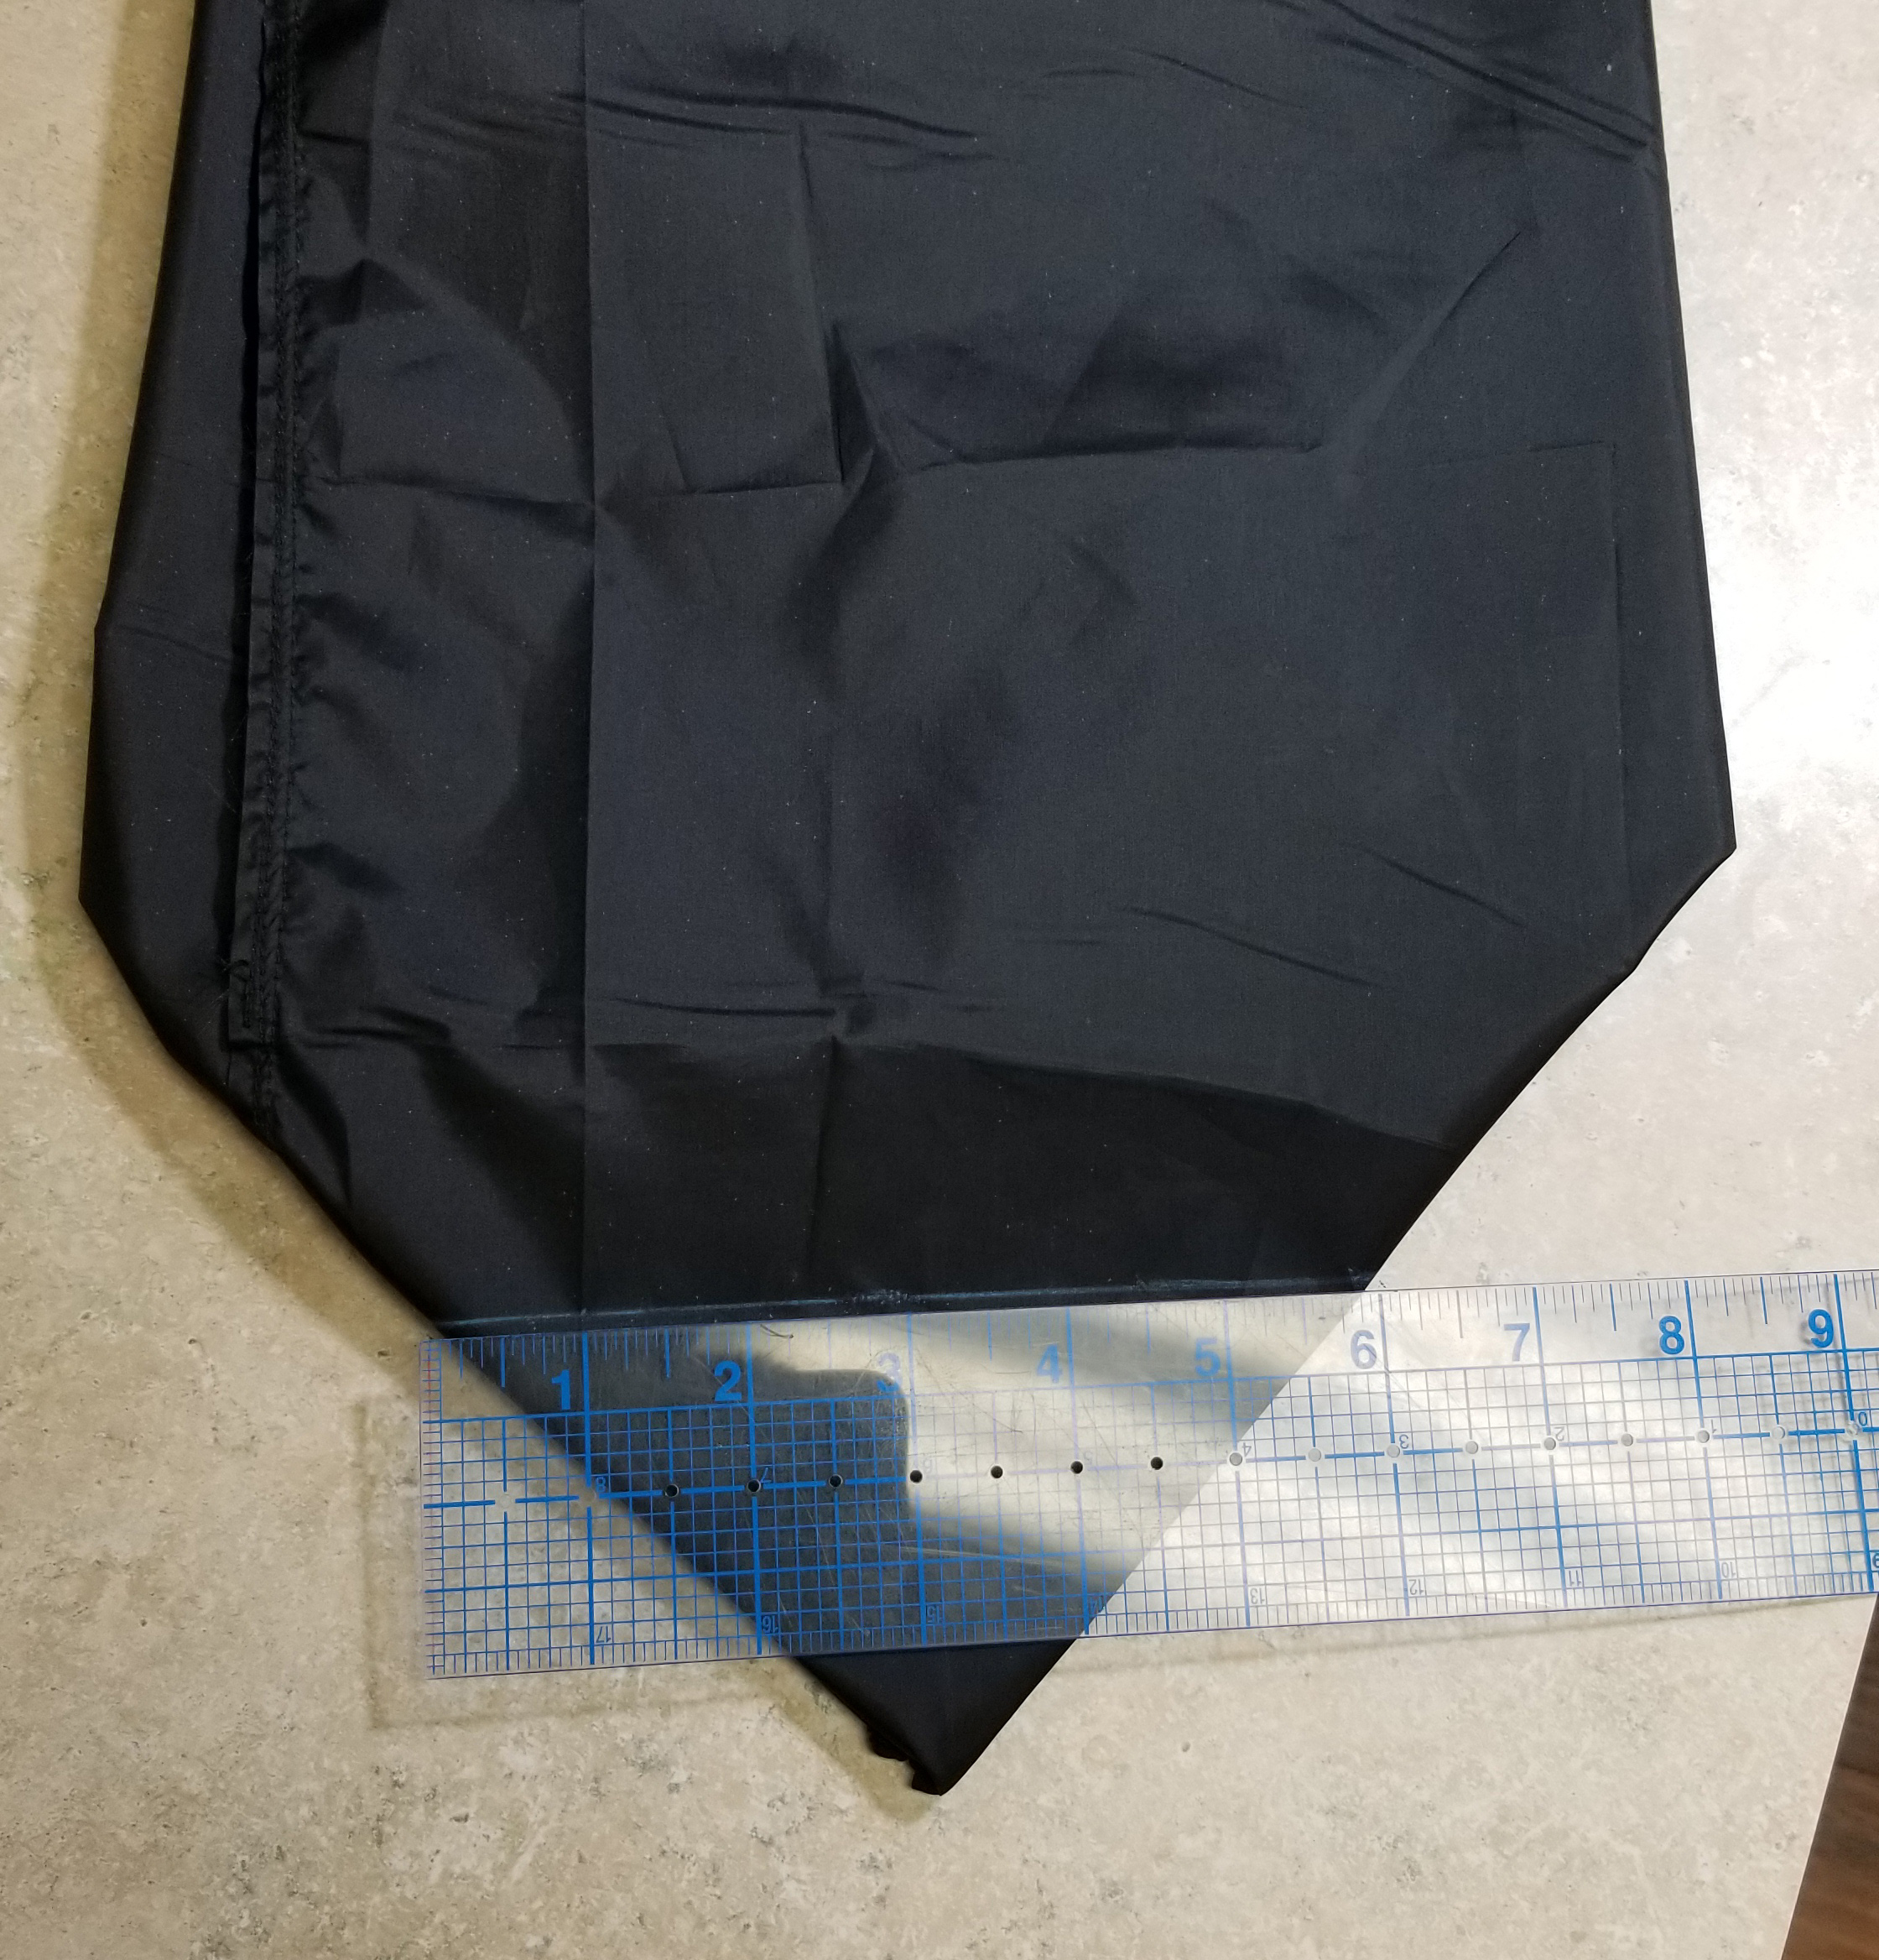
Step 15
Double stitch along this line and trim off the excess fabric. Repeat this step on the other side of the bag creating a square bottomed stuff sack. 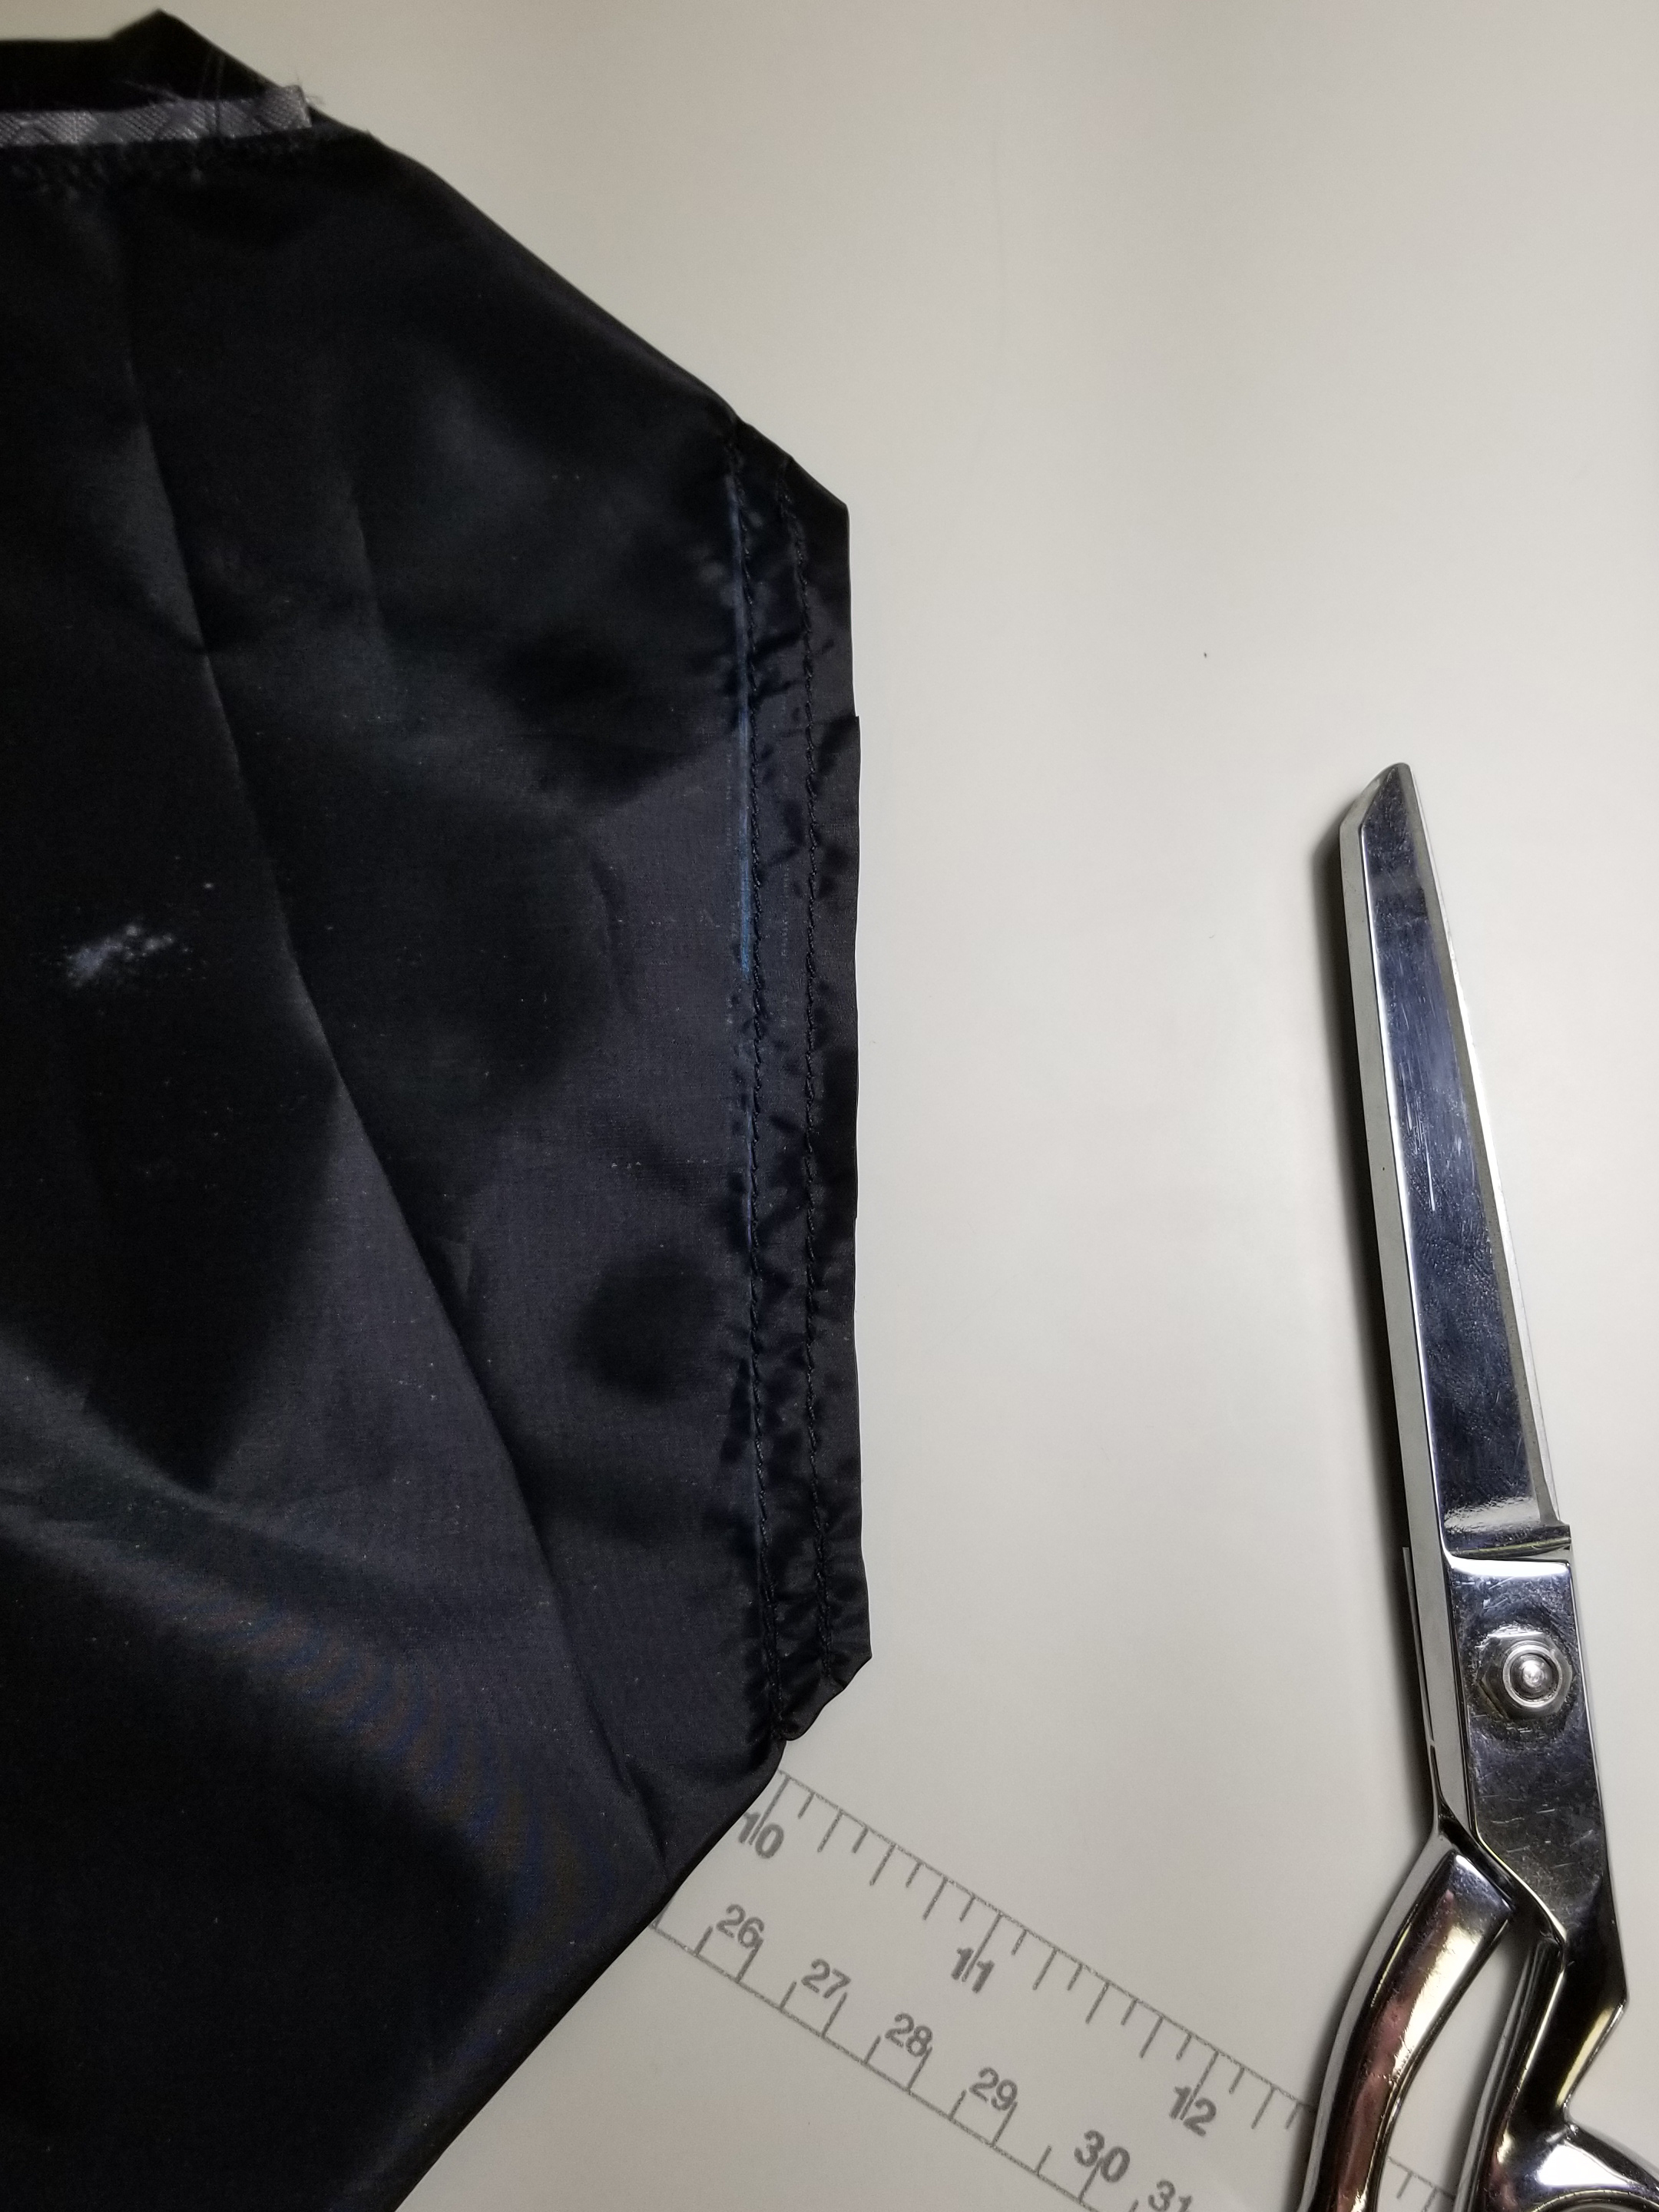
Step 16
Roll hem the top of the bag with an approximately 1" seam. Leave about 1/2" between the start and the stop of this stitch as an area for the draw string to go through. 
Step 17
Thread the draw string (Zing It) through the channel you've just created, add a mini cord lock, tie an overhand knot in the ends, then trim and fuse the cord **Note** you may have to tie a slip knot behind the cord lock when the bag is fully loaded and compressed to keep it from slipping open. 
Step 18
Turn the bag right side out. Step 19: Thread one male end of side release buckles onto each 15” piece of grosgrain. Then roll back 1/2" at the free end and stitch to act as a stopper for the buckles. 
Step 20
Enjoy your new gear!!


